

Nowadays, no business can survive without having a social media influence. This marketing avenue has grown exponentially over the years, that it would be a waste not to tap into its potential. That’s also why social media managers have become one of the most integral roles in a company. Any business needs social media exposure to become relevant. That’s what social media experts do. And if you’re one of them, you need to know how to find a way to bill your clients. That’s where a social media invoice template comes in handy.
A social media marketing invoice template is a document that’s used for invoicing and billing. Before you take on a social media marketing project, it’s important to solidify your agreement with the client at the project’s onset. This period will involve either securing a reasonable deposit or payment for your social media marketing services.
It doesn’t matter when you would want to send a formal request of owed payment. But you will need to make sure that the invoice you send will remain unique and uniform throughout the system. This level of consistency and professionalism will allow you to gain more clients, all while maintaining current ones.
In this article, we will go over all the nuances and information that you need to know about creating a social media invoice template. That way, you will have a proper format to follow to make sure you are consistent with your invoicing.
What is Social Media Invoice Template?
A social media marketing invoice is a type of billing document commonly used for the pre- or post-collection of payment (also known as invoicing period) from an individual or business to provide social media marketing services.
Freelance social media marketers or agencies usually charge their services hourly, as a single project cost or a monthly fee. In addition to listing all of the cost of the work and performance, having a social media marketing invoice allows for detailed notes, the payment due date, and any other essential contact information. These details will be essential for maintaining a professional profile and appearance for clients.
What is Social Media Marketing?
Social media marketing is a branch of internet marketing that focuses mainly on sharing different media formats on internet social platforms. This activity aims to reach a wide or concentrated demographic of people to increase or improve a business’s online presence and influence. By doing so, it will hopefully garner leads that will result in sales.
A social media marketer or marketing expert is a master in making posts go viral and have people talking about them. They tend to achieve this level of social media marketing excellence through thorough planning and in-depth research.
Types of Social Media Platforms
Some social media agencies think that the best option is to offer a few services on one, two, or multiple platforms. On the other hand, other companies provide a wider breadth of social media marketing options, which will allow them to acquire a complete and diverse set of clients.
No matter what type of social media marketing strategy you offer, what’s important is to know and understand the different kinds of social media platforms. This level of knowledge will prove essential for freelance marketers and full-fledged digital marketing agencies.
According to our latest research, the most common types of social media platforms are categorized in the following list:
- Social Networking Sites (e.g., Facebook, LinkedIn, Twitter)
- Image Sharing Sites (e.g., Instagram, Imgur, Snapchat, Pinterest)
- Social Review Sites (e.g., Yelp, TripAdvisor, Angie’s List)
- Community Blogs (e.g., Medium, Tumblr)
- Video Hosting Sites (e.g., YouTube, Vimeo)
- Sharing Economy Networks (e.g., Rover, AirBnB)
- Discussion Sites (e.g., Quora, Reddit)
How to Create a Social Media Invoice Template
Now that you know everything about social media marketing, it’s now time to learn how to create your very own social media invoice template. You will have three options in doing so:
You can download a free social media invoice template in your preferred invoicing platform;
Create a social media invoice from scratch on your preferred word processing application; or
Create a social media invoice from scratch on the ReliaBills website.
The common denominator of these three options is filling out the blank fields with all the relevant information about your invoice. We combined all of these processes into a single, convenient step-by-step process outlined below:
Step 1: Download your Template
First, if you prefer the pre-made social media invoice template, make sure you download it first in either Word or PDF format.
You can use the links available on your preferred invoicing site. Please save a copy of the template so that you can use it again for future invoices. If you’re going to create a social media invoice manually or via the ReliaBills website, you can skip this step and go straight to your preferred word processing application. For ReliaBills, you will need to create a free account before creating your invoice from the actual platform.
Step 2: Name the company seeking payment.
Start your invoice creation journey by inputting the social media marketing company or manager’s legal professional name. You can insert this in the first blank textbox.
The header will continue with your company’s contact details. Usually, it will start with the “Name” line, which will feature the social media marketing representative or social media manager’s name.
The next three lines following the name will focus on the social media marketing company or social media manager’s mailing address. The address would include the street name and/or number, City/State, Country, and Zip/Postal Code.
Insert the office line or customer service number where the client can use to reach the social media marketing company or manager. Add this number to the next blank line below.
The header will finish with the social media marketing company or manager’s “email address.” You can add this on the following blank line. If you want to input more than one email address, you can do so in the following lines.
Step 3: Identify the Invoice information.
A structured and well-organized invoicing process includes a unique invoice number in every invoice it sends. This invoice number also acts as the invoice filing number. Many companies consider this feature an invaluable tool to refer to previous invoice documents. In addition, your clients would also be able to locate and review past invoices quickly. For invoice templates, the horizontal bar below the header will display an empty line with a label saying “invoice no.” Generate a unique invoice number and insert it on this line.
The invoice “Date” features the exact date on when the invoice was created. You can add this information right below the invoice number.
Step 4: Make a report on the client’s name and other essential details.
Your client’s name and other details should also be mentioned in the invoice. This person or organization is responsible for paying you. So, make sure you highlight their information on the invoice as well. For free invoice templates, seek out the “Bill To” heading. Fill out the social media marketing client’s complete name on the first available space.
The next three spaces will feature the client’s billing address. Like your address format, include the street name/number, City/State, country, and Zip/Postal code.
Step 5: Present the social media service provider being commissioned.
You should also mention the social media marketing services provided to the client once the invoice is paid. The “Description” box will request information like the agreement’s title and signature date, a social media marketing service package, or the types of social media marketing-related services that will be performed or have already been performed for the client.
Step 6: Add the corresponding price to all the social media services provided.
The second column will serve as the pricing report for the social media marketing services provided. The basic costs should be itemized and listed in the first textbox under the “Amount” heading. The items on the price should correspond to each marketing package or contract mentioned in the “Description” column.
Once you’ve filled these fields, continue to the next textbox down. This will be labelled with “Subtotal” since it wishes a sum of the social media marketing costs (expected through this invoice) will be shown without the added taxes.
Any “service tax” or “sales tax” that is mandated by the state where the social media marketing company or manager operated must be documented separately from the “subtotal.” Calculate the total sum of taxes included in the invoice, then record it in the “Tax” field.
It is also worth noting that while many social media services are not taxable in the majority of states, any physical item produced or sold to the client will likely be subjected to a sales tax. Examples would include an app or program that must be purchased or a hard copy of any promotional materials.
The last part of this table will feature the “Total” amount requested by the social media marketing company or manager. Add the invoice “Tax” and “Subtotal” amounts together to get this number. The resulting amount will be displayed in the “Total,” which must then be paid by the client.
Step 7: Declare when the total is due.
We recommend that you mention when the social media marketing payment is due. Use the invoice “Date” field as a beginning. Record the number of days wherein the social media marketing company considers a grace period for payment. Locate the bank line after the “Payment Due Date” line to complete your invoice. It will also inform the client of the deadline.
Step 8: Include additional content.
Some client jobs will be the result of an agreement, while others may only be project-based. If any agreements are involved with this invoice or result from this invoice, it is generally required to include a copy for the customer’s satisfaction. The “Comments” or “Special Instructions” line will allow you to name any such attachments or have additional notes or dialogue directly to your invoice.
Step 9: Automate Your Social Media Invoice
Now that you know how to create an invoice, it’s time to automate the process! There are a few different ways you can go about automating your invoicing system:
- Take advantage of recurring billing features offered by your preferred invoicing software.
- Use a payment gateway that can automate payments for you.
- Integrate your invoicing with your accounting software to save time on data entry
- Use an online invoicing tool like ReliaBills. This tool makes it easier to create and send invoices, and it also offers other features like tracking payments and creating reports.
- Integrate your invoicing system with your accounting software. This will automate creating and sending invoices, tracking payments, and creating reports.
You might be wondering, “what’s so special about automation and recurring payments, anyway?” Well, there are multiple advantages to this billing approach; here are some of them:
Benefits of Automated Recurring Payments
- Automatic payments are more likely to be paid on time than payments that are manually initiated. This is because there’s less opportunity for human error when using an automated system.
- Automated recurring billing can help you save money by eliminating late payment fees and penalties.
- Automating your payments makes it easier to lower prices or offer discounts.
- Automating payments will help you keep track of all your customers’ histories, so it’s easier to identify new business opportunities and solve customer problems in the future.
- Automating payments guarantees a more consistent and predictable cash flow, which is essential for any business.
- Automating payments prevents you from calling a customer late on a payment. You can simply send them automated reminders via text or email!
- Automating payments means you have less data entry to do each month, so it is a time saver for your business as well.
Most invoicing software today has some sort of recurring billing feature available (and if yours doesn’t, then consider switching to an invoicing software that does). If you’re unsure how to use this feature, open your invoicing program and look for a “Recurring Invoice” option.
Why ReliaBills?
Of all the accounting and invoicing platforms available, we would like to highlight our very own ReliaBills and its recurring billing features.
At just $24.95 per month, ReliaBills PLUS, its premium version, brings forth additional features that let you create and set up your very own recurring invoicing system. You also get access to several other features:
- Create and set up recurring invoices in just a few steps using the platform’s built-in scheduler.
- Track your customers’ payments through detailed reports that show you if they have paid their bills or when it is due for payment.
- Get notified via email about late payments so that you can engage your customers for an amount. You can even automate your follow-up email so that you’re 100% hands free when it comes to invoicing clients. That also means you won’t have to remind customers about their upcoming bill since payments are done automatically.
With ReliaBills, you can guarantee that all of your invoicing and recurring payment needs are wrapped in one convenient and easy-to-use platform. So, if you’re interested, check out ReliaBills today!
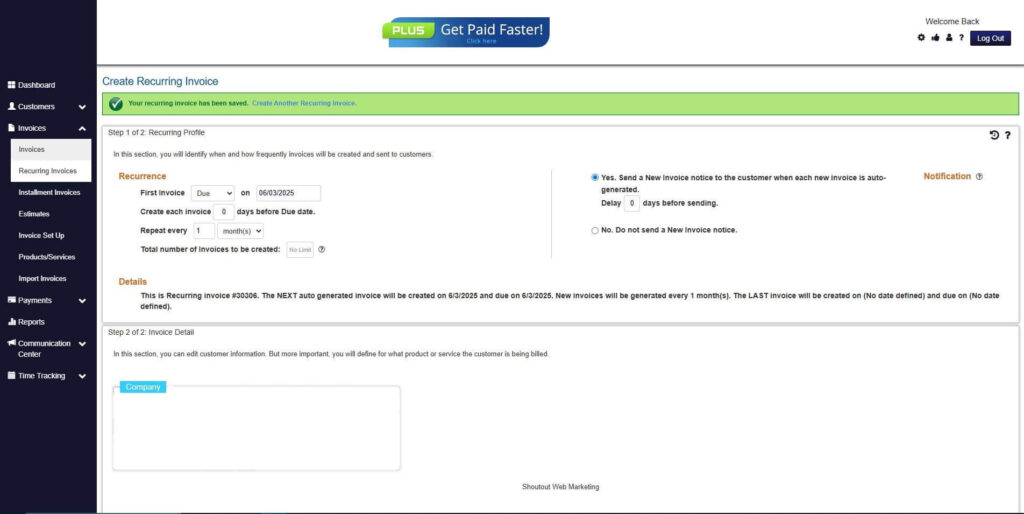
How to Create a New Recurring Invoice Using ReliaBills
Creating a New Recurring Invoice using ReliaBills involves the following steps:
Step 1: Login to ReliaBills
- Access your ReliaBills Account using your login credentials. If you don’t have an account, sign up here.
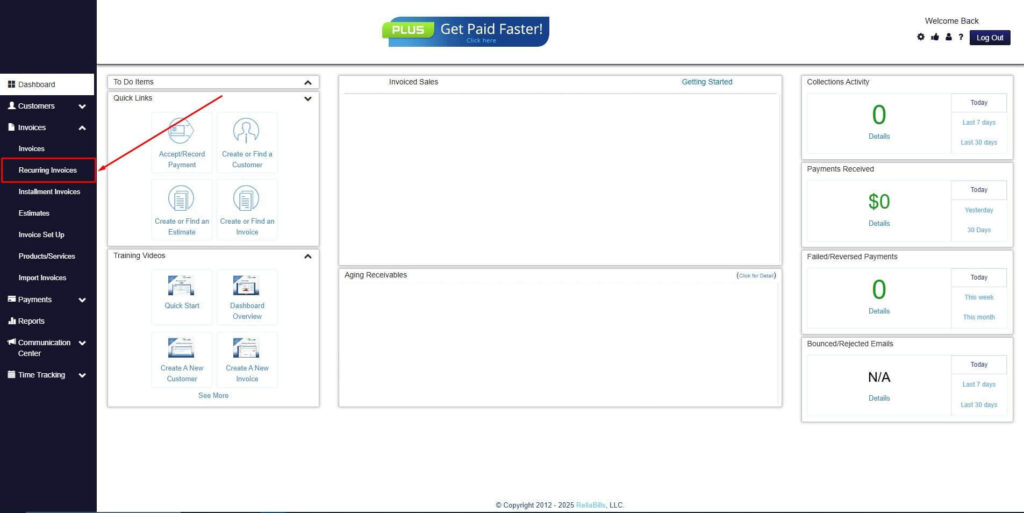
Step 2: Click on Recurring Invoices
- Navigate to the Invoices Dropdown and click on Recurring Invoices for an overview of the list of your existing customers.
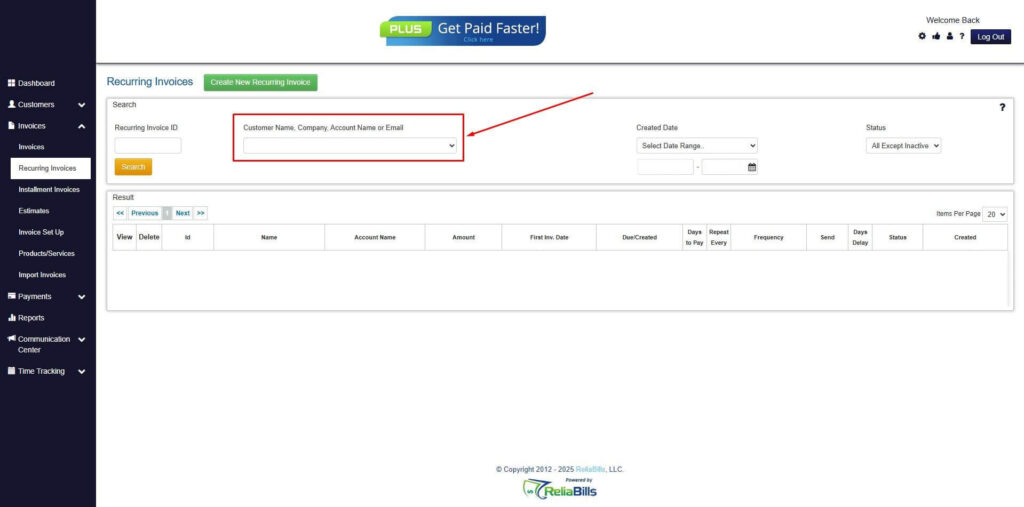
Step 3: Go to the Customers Tab
- If you have already created a customer, search for them in the Customers tab and make sure their status is “Active”.
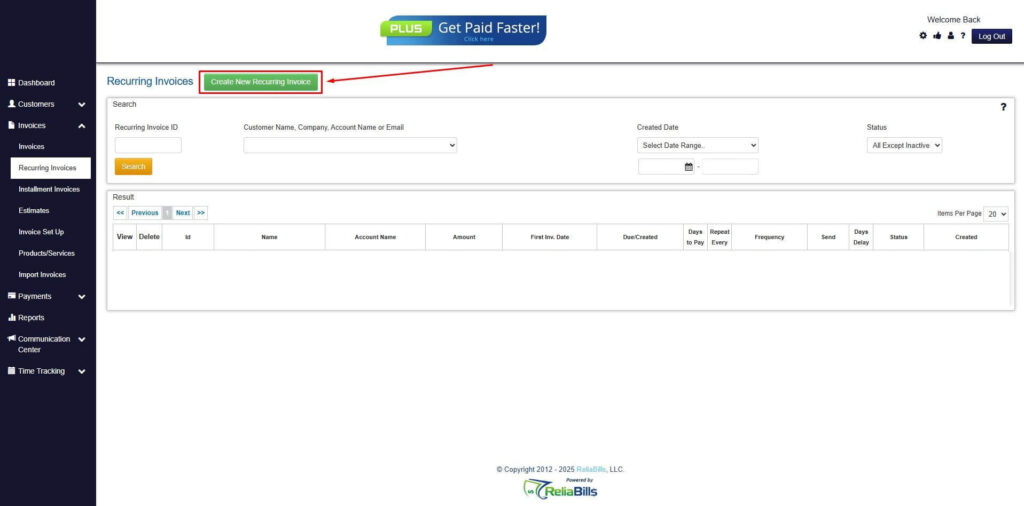
Step 4: Click the Create New Recurring Invoice
- If you haven’t created any customers yet, click the Create New Recurring Invoice to create a new customer.
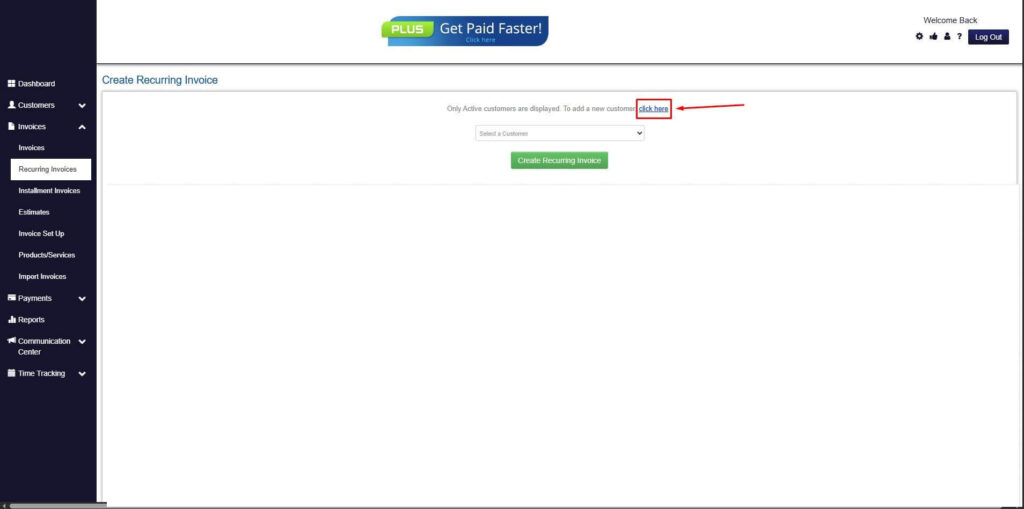
Step 5: Click on the “Click here” Button
- Click on the “Click here” button to proceed with the recurring invoice creation.
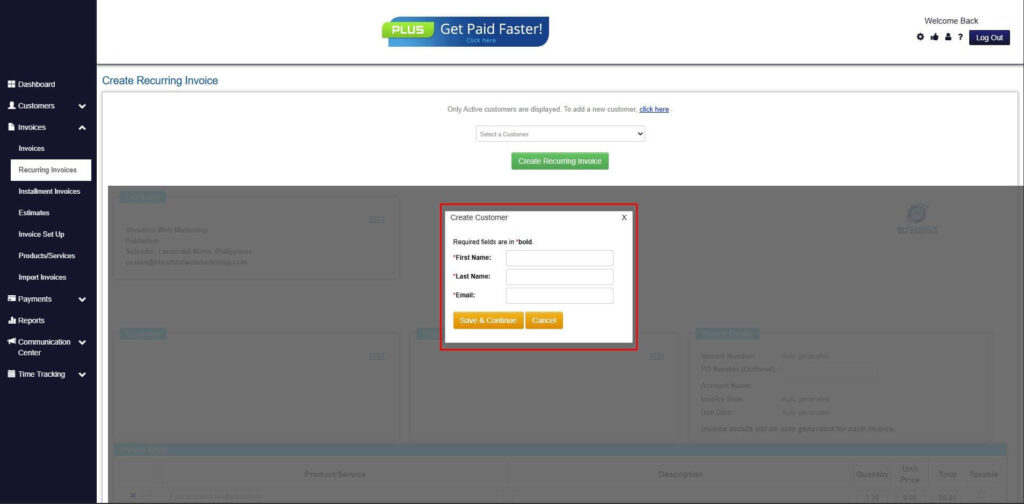
Step 6: Create Customer
- Provide your First Name, Last Name, and Email to proceed.
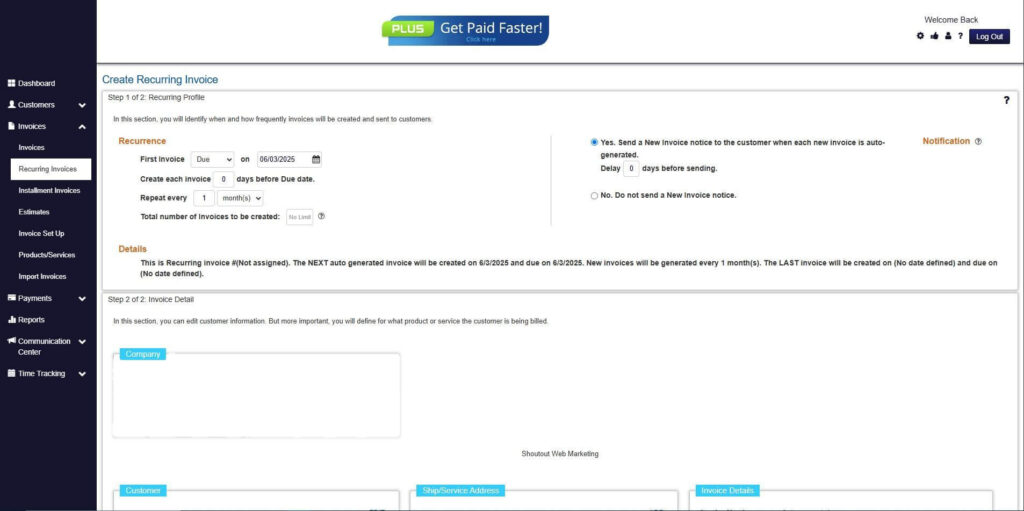
Step 7: Fill in the Create Recurring Invoice Form
- Fill in all the necessary fields.
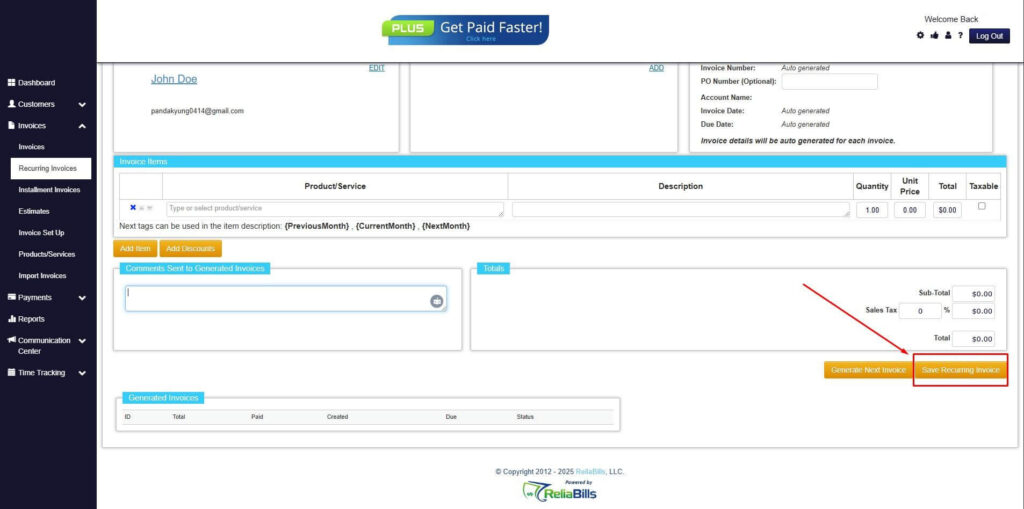
Step 8: Save Recurring Invoice
- After filling up the form, click “Save Recurring Invoice” to continue.
Step 9: Recurring Invoice Created
- Your Recurring Invoice has been created.
Wrapping Up
Congratulations! You’ve just created your social media marketing invoice template. It may look not very easy. But when you get used to making one, it will be an easy and hassle-free process. Always keep in mind that invoicing is one of the most crucial parts of doing business. It lets you get paid and makes sure your clients comply with their duty to deliver you the money they owe you. So, make sure you exercise your rights by sending them a professional invoice. Not only will you get paid, but you will also improve your company’s reputation in the process.