If you’ve just started freelancing for the first time, you need to make sure that you get your first pay. That way, you can kick-off your freelance career on the right foot. Whether you’re only doing a single freelance gig a month or running it full-time, you must know how to calculate the time you’ve worked and bill your clients accordingly. That means you should also know how to draft a freelance invoice.
If you’re entirely new to freelance work, you might not know where to start or how to create a professional-looking invoice in the first place. You might also be wondering how and when do you send it to your client? I know you have a lot of questions in your mind right now, so let’s jump right in – here’s everything you need to know about creating your first freelance invoice.
If you plan to invoice your clients on a regular basis, consider investing in an invoice generator, or an online invoicing system like ReliaBills. We’ll talk about it more later.
For now, let’s talk about the basic elements that comprise a freelance invoice. That way, you will know what to include in your first bill.
How to Make Your First Freelance Invoice
Here’s What to Include:
It may seem intimidating, but creating your freelance invoice is pretty straightforward. The hard part is you are doing work for your client. Not it’s time to reap all of that hard work and get yourself paid. Your invoice doesn’t have to be fancy. What’s essential is that it should look professional and contains all the necessary details and information.
With that said, here’s how you should write your invoice, according to TheWriteLife:
1. Professional Header
The first element that should be seen in your freelance invoice should be your business name and your full name. It should also be in a clear, easy-to-read font style.
Do you have a logo for your freelance business? Include that as a part of your header. Keep in mind that a logo is optional, so don’t worry about it. The font size of your full name of the business name should be visibly bigger than the rest of the test on the invoice. It should also be bolded for added emphasis.
2. Contact Information
The next element to include in your freelance invoice is your contact details. At the very lead, your contact information should include your mailing address, phone number, email address, and website. These details should be placed right underneath your freelance business name. To make it much easier to read, type the info on several like the example below:
ReliaBills
540 Lake Street
Excelsior, MN 55331
support@ReliaBills.com
1-877-932-4557
reliabills.com
Include your contact details on the top left or right of your freelance invoice. It will depend on personal preference, so choose which side suits best for you.
3. Client’s Contact Information
The next element to include in your freelance invoice is your client’s contact information. By including your client’s contact details, you’re specifying who the invoice is for. Include the client’s name, address, phone number, email address, website, and other relevant information. You will look back and review this section later if you need to track down payment. That’s why it will help to include all the client’s contact information in your freelance invoice.
Some will pet their contact information on the opposite side from the client’s contact details, while some will left-align it all. Again, it will depend on personal preference. So follow what you think is best for you.
4. Invoice Number
Every freelance invoice should have a unique invoice number. What is this number? It serves as an identifier that will help keep track of your invoices. The type of numbering system you use doesn’t matter. What matters is that you make sure it’s in sequential order. That way, you won’t get confused when sending your professional invoice.
For instance, if this is your very first invoice, you might start with #A0001. Then your next invoice would be #A002, even if it’s for a different client. Always keep in mind that each invoice you send will have a corresponding number. That way, you can easily track what invoice has or hasn’t been paid.
The placement will make it easier to keep track of all vital information – both for you and the recipient. Keep in mind that professional invoices are important for your business to be recognized and respected. By sending invoices like this one, your clients will know that you’re the real deal.
If you’re looking for a simple invoice template, you can do so by searching the internet. There is a tone of freelancers’ invoice template options available. So make sure you browse for the ideal invoice template that’s right for you.
5. Date Prepared
Add the date of when you submitted your freelance invoice to the customer. The date prepared line will be crucial because you’ll need to refer to it in the event of delayed payment. We will discuss this more in detail in the payment terms section.
6. Deadline / Due Date
Make sure you also specify when the payment is due. The deadline is entirely up to you. However, most freelancers – and invoicing system for that matter – use a 30-, 45, or 60-day timeline. You can also add a note in your invoice that says, “Due upon receipt.” This note means the recipient is required to pay the invoice promptly.
In addition, this shouldn’t be the first time your client has heard about the due date. When you agreed to do the work, you will sign a contract agreement where it will state the expectations for both you and your client.
If your customer doesn’t pay on time, you can refer back to this deadline, as well as the date prepared, if necessary.
7. Payment Options
If you want to be paid faster, you need to offer multiple options for payment. Your clients will love you even more if you specify your payment option in the invoice, and that you have multiple of them. Whether you prefer to be paid in cash, check, credit card, payment service like PayPal, or all of the above, you must state that in your invoice.
Some companies offer direct deposit to their bank accounts if you work with them regularly. However, it’s more likely that you’ll have to send an invoice to request payment every time you complete a job.
8. Payment Terms
Along with the timeline for payment, you might also want to specify whether you charge a late fee for your freelance invoices paid past the due date. Some freelance companies use this strategy to enforce getting paid on time. Typically, a late fee is around 15 to 20 percent of the total invoice fee.
If you utilize a late fee, we highly recommend that you remind the client at least once or twice that the invoice they sent you is overdue. That way, you will give them the chance to pay it without a fee. While you must get paid, you also need to keep the client relationship strong and intact. That way, you will be invited to work with the client again in future projects.
9. Breakdown of Services
Also, add a breakdown of the services that you’ve rendered. That way, the client will know exactly what the invoice is all about and what items or services they are paying for. If the client hired you for a number of services, make sure you list down all of those services. That way, it will be easier to scan and digest. Your client will also appreciate the clarity of your invoice.
10. Amount Due
Of course, you should also outline the amount that is due for payment. Always remember to add how much your client owes you.
If you break down the services that you have rendered, make sure that each line has a corresponding amount, with the total amount right at the bottom. Bold the total amount for emphasis. That way, it will be easier to see on the invoice and not cause any errors or mistakes when payment is made.
Some clients, particularly older folks, will have a hard time seeing small letters. By bolding and making the font of the total amount bigger, they will be able to see it clearly and pay you in full.
11. Thank You Section
Last but not least is the thank you line. This line is where you will add a personal touch to maintain a good relationship with your client. It should be found right below the total amount. Add a thank you note in that section. If you need to include additional information or reminders, the thank you section is a great place to do that.
How to Send an Invoice?
If you write your invoice manually, we highly suggest that you convert it into PDF format. That way, the recipient won’t be able to alter it. Sen the invoice PDF file to your client as an attachment to your invoice email.
One important tip to keep in mind when your invoice by email is to write the invoice number and amount in the email subject line. That way, it will be easier for you and your client to find. Doing so will also increase the chances that you will get paid on time.
You can also use an invoicing system like ReliaBills. More on that later, after we discuss how to follow-up on your invoices.
How to Follow-up After You Sent an Invoice?
Designing a professional-looking invoice isn’t hard, especially if you use online invoicing systems. What’s hard is ensuring your clients will pay you one time.
Following up with your clients as the invoice due date approaches is an excellent way to freshen your client’s memory about your pending invoice. You can send a follow-up email asking how things are going with the client. You should also ask if they need anything else.
Once you get a response from a client, if there’s no mention of the invoice, you can reply with a friendly reminder email. Try asking if they received the invoice or any concerns or confusion regarding the invoice or the details outlined.
How ReliaBills Can Help You with Invoicing?
The reason why you think invoicing is hard is because you haven’t discovered ReliaBills and its incredible invoicing system. If you want a Free invoice system that offers comprehensive features, you should check out ReliaBills today. It offers full invoice customization, as well as scheduling and notifications. That way, you can create professional-looking invoices, schedule them to be sent on a particular period, and get notified whenever you get paid.
ReliaBills also offers example invoices, simple invoice templates, professional invoice templates, business invoices, client-based invoices, etc. That way, you will have full customization over your invoice. That way, you will get paid on time.
The best part about ReliaBills is that it’s 100% FREE! You won’t have to pay any extra charges or membership fees. All you need is to register for an account, and you can start using ReliaBills. If you do want some added features, you can upgrade to ReliaBills Plus for only $24.95.At ReliaBills, we go the extra mile when it comes to getting you paid.
Contact us now for more information on how we can help you with invoicing.
How to Create a New Freelance Invoice Using ReliaBills
Creating an invoice using ReliaBills involves the following steps:
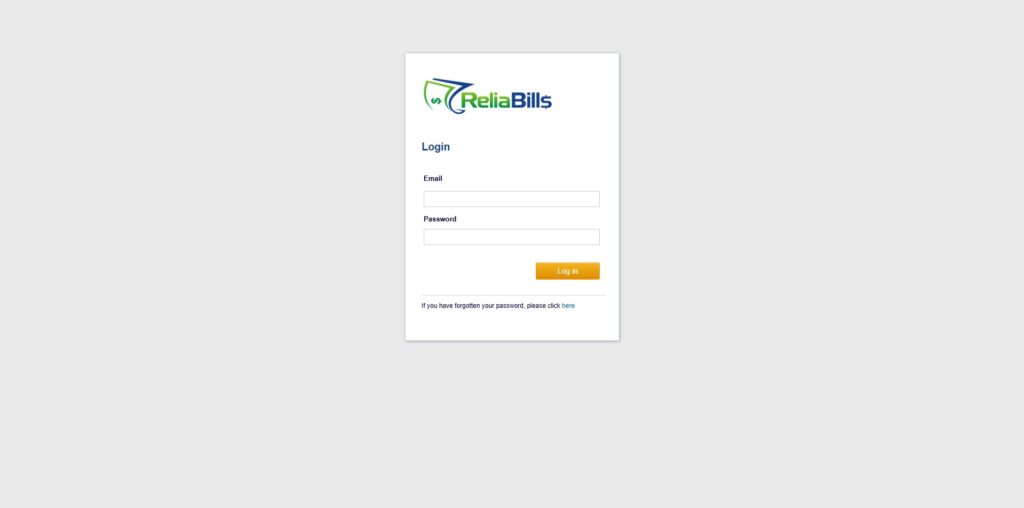
Step 1: Login to ReliaBills
- Access your ReliaBills Account using your login credentials. If you don’t have an account, sign up here.
Step 2: Click on Invoices
- Navigate to the Invoices Dropdown and click on Invoices.
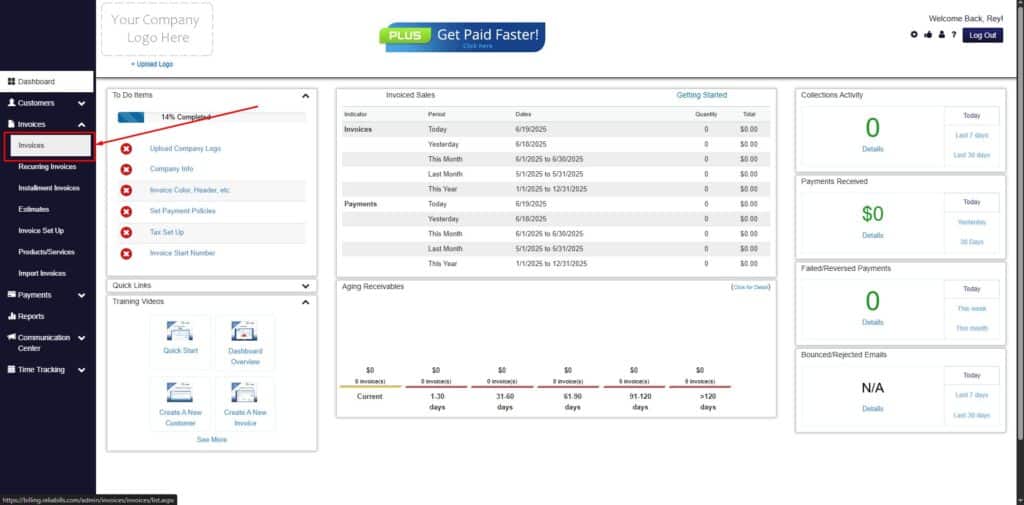
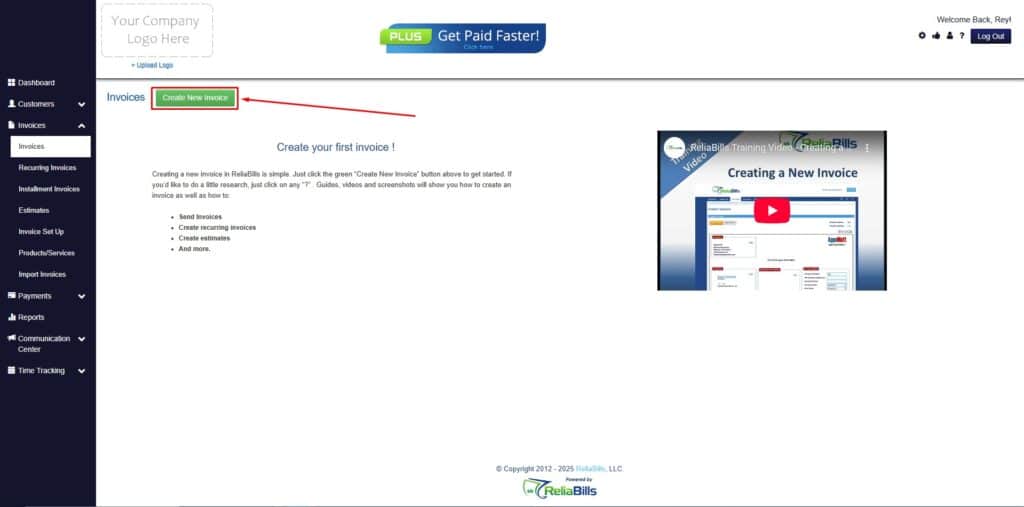
Step 3: Click ‘Create New Invoice’
- Click ‘Create New Invoice’ to proceed.
Step 4: Go to the ‘Customers Tab’
- If you have already created a customer, search for them in the Customers tab and make sure their status is “Active”.
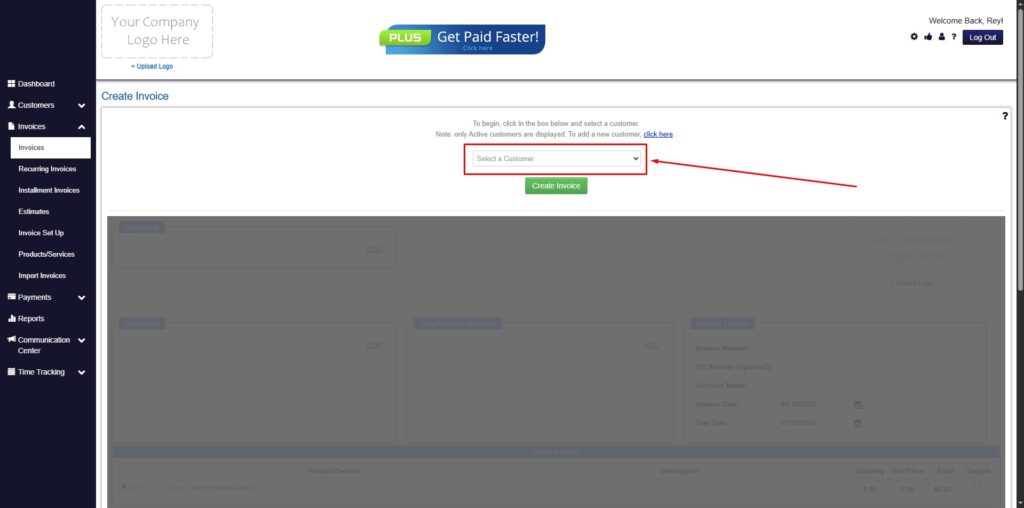
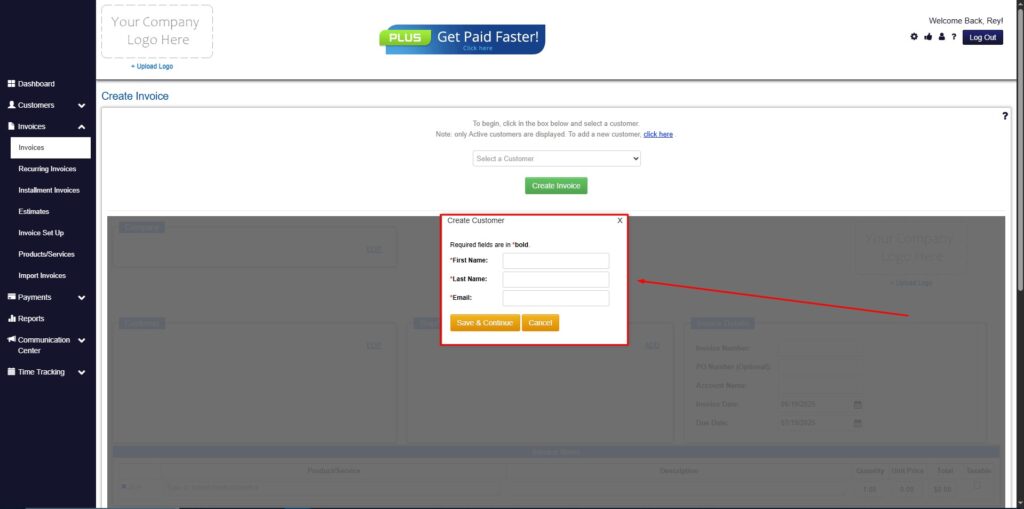
Step 5: Create Customer
- If you haven’t created any customers yet, click the ‘Click here’ to create a new customer.
- Provide the First Name, Last Name, and Email to proceed.
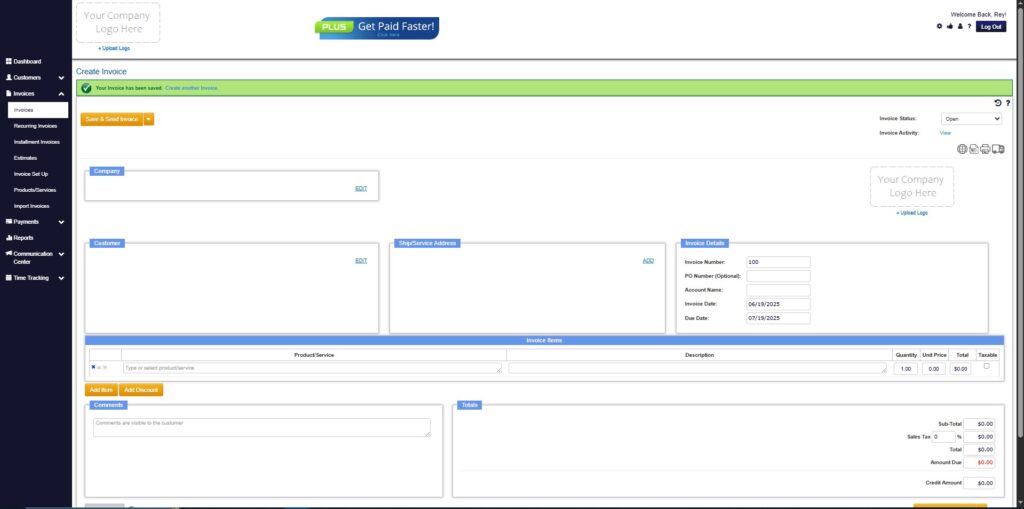
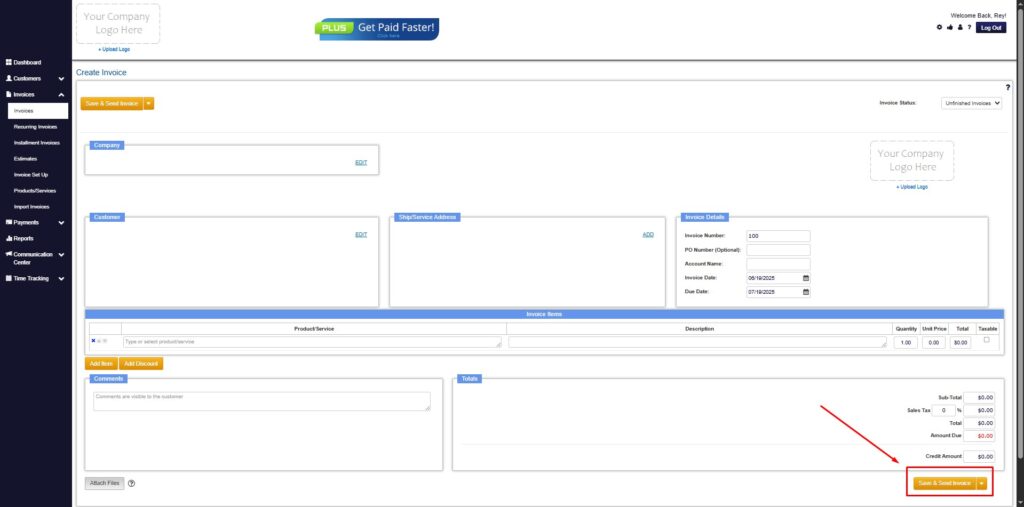
Step 6: Fill in the Create Invoice Form
- Fill in all the necessary fields.
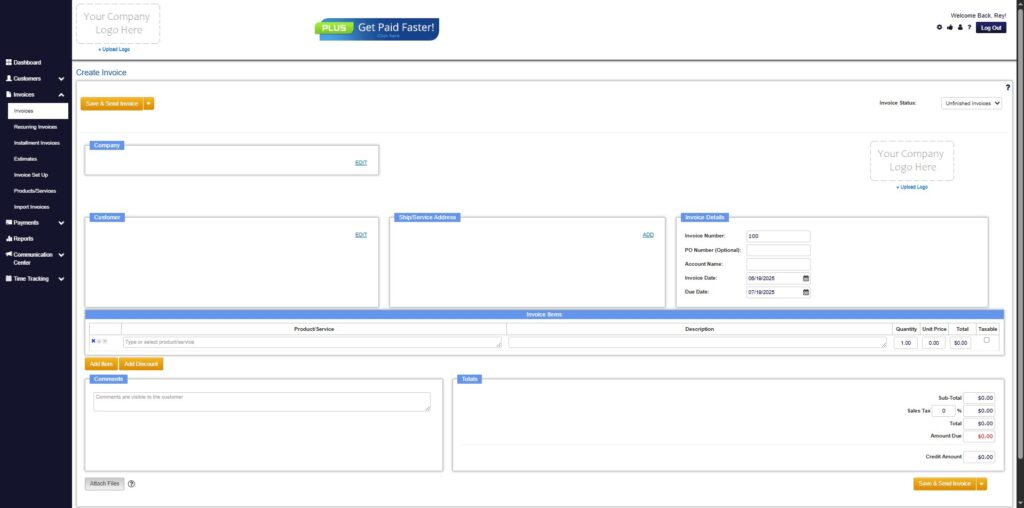
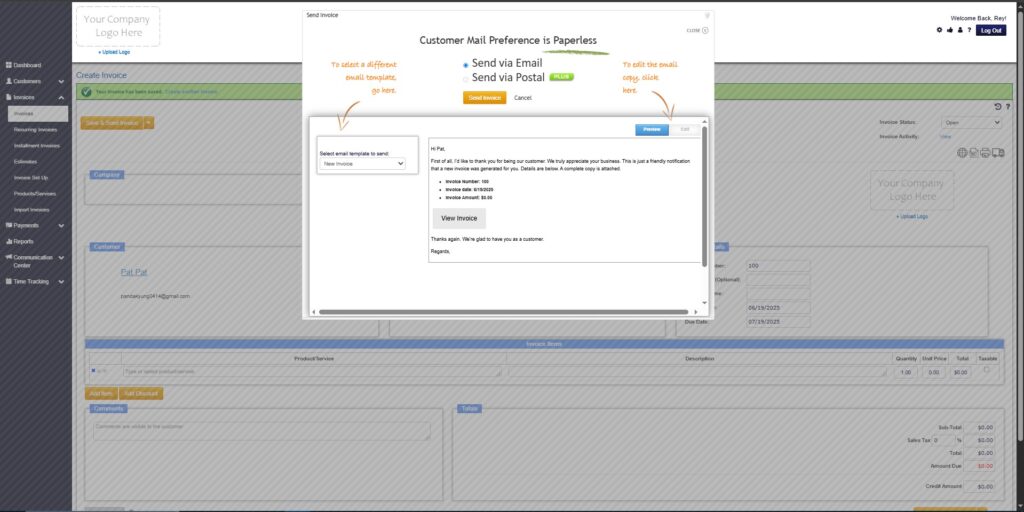
Step 7: Save Invoice
- After filling out the form, click “Save & Send Invoice” to continue.
Step 8: Invoice Created
- Your Invoice has been created.