Customers
Customer Overview
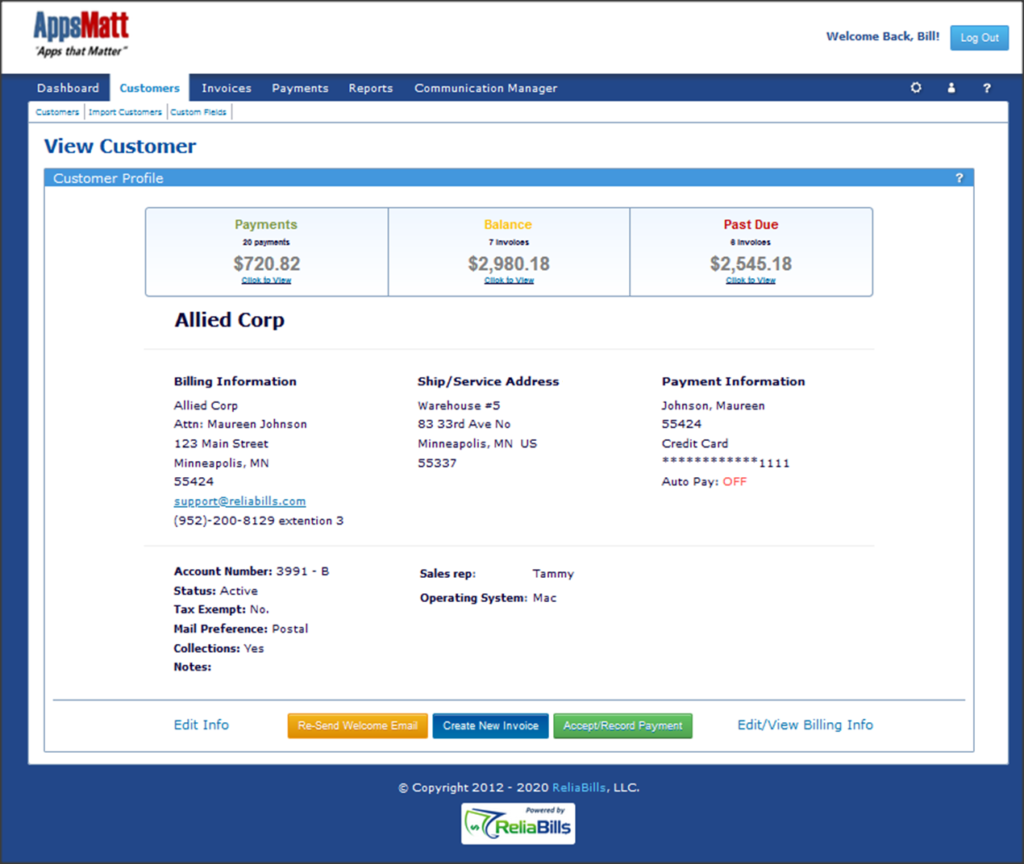
With ReliaBills, customer information is always at your fingertips. The Customer Profile page is your customer dashboard. Here you can see all relevant information about your customers
- Balance
- Payment and billing history
- Billing Information
- Shipping/Service Addresses
- Account preferences
- Payment Information
- Custom settings
Creating or adding a new customer is simple. Like many functions in ReliaBills, there are several ways to get to the customer page.
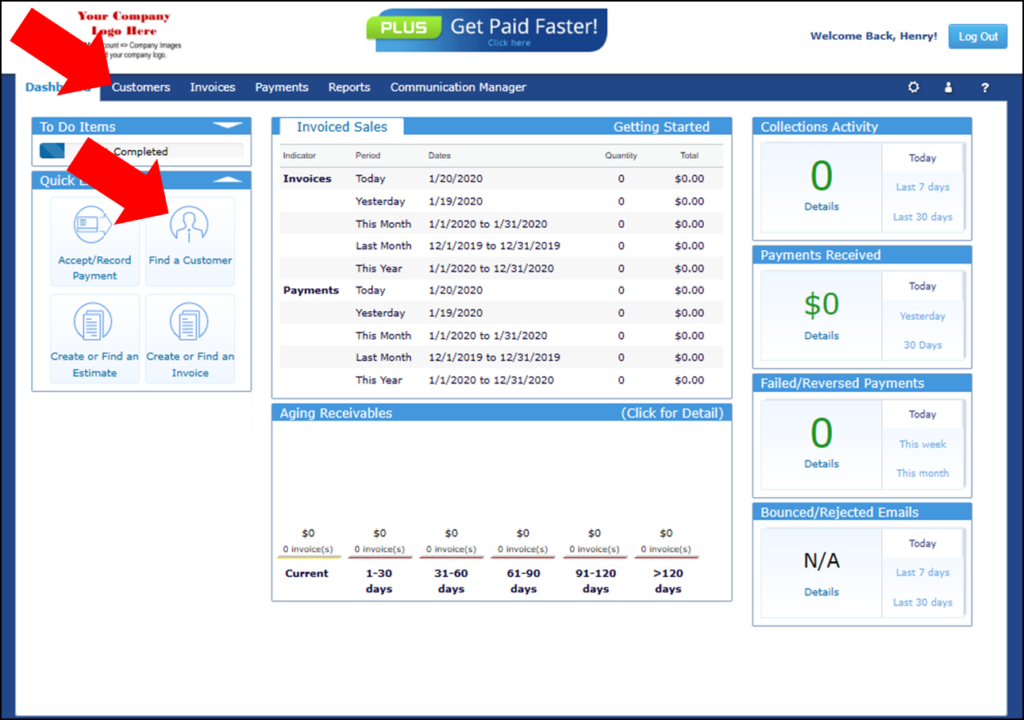
From the ReliaBills dashboard, click the customers tab at the top of the page, or click the Quick Link. Both will take you to the Customer page. Here, you will start by entering your customer’s address and billing information. Specifically, where and to whom do you want invoices sent.
Create New Customers
If this is your first customer created, you will see some simple instructions and a handy video tutorial. To create your first customer, just click the green CREATE New Customer button. This will take you to the New Customer Set-Up page. Here you can begin adding your customer’s information.
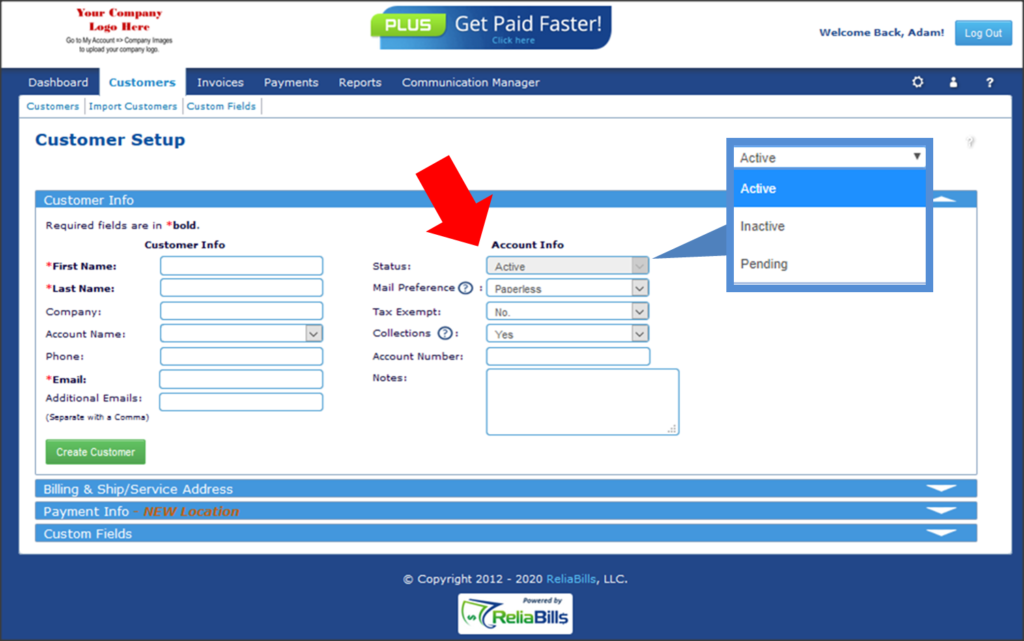
Customer Setup – Customer Info
In this first section, you will be able to add basic about your customer. Much of this information will be used to identify your customer (Name, Company, etc.) and also to identify their preferences (email versus postal, collections, etc.).
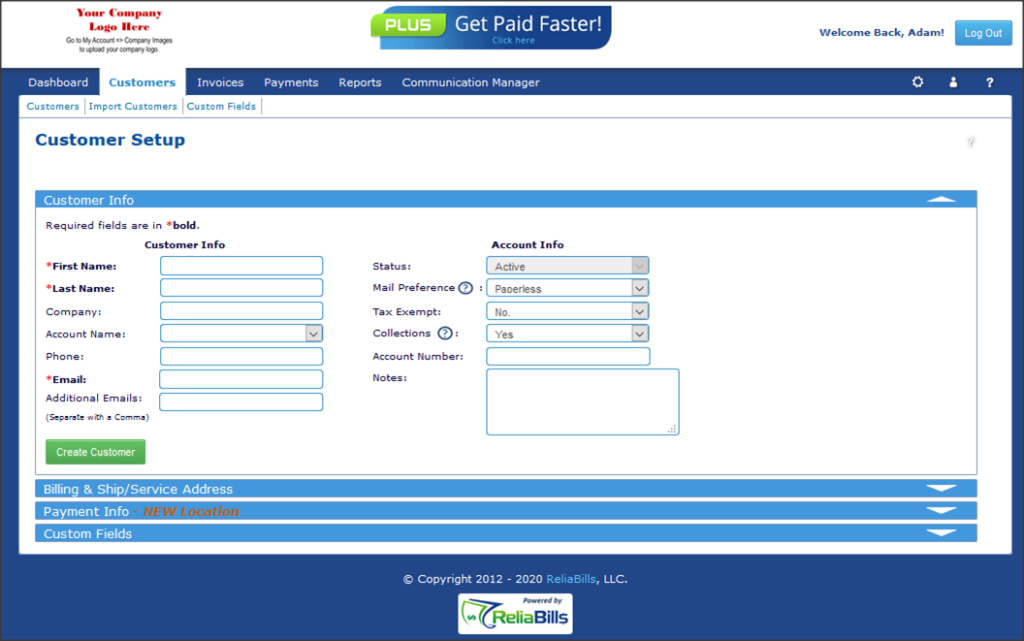
- First and Last Name are required fields. That’s because personalization is VERY important when it comes to getting paid. Sometimes you may only have “Accounts Payable” as a customer. That’s fine. Use that as the first name.
- Company Name and Account Name are both optional. Use them to help you identify an account.
- Phone Number is not a required field. You can enter information in any format that you wish. Include extensions if applicable.
- Email Address is a required field. This should be the email address of the primary contact. Enter ONLY ONE email address here.
- Additional Emails. You can add additional email addresses in here. Separate multiple addresses with a comma. No spaces. These addresses will be copied on all emails sent to the primary contact.
- Mail Preference is available only in PLUS. Allowing you to identify the customer mail preference as postal or paperless. If Postal is selected, address information will be required. ReliaBills will print, fold, insert and mail invoices via first-class US mail.
- Tax Exempt allows you to identify those customers who are not subject to state and federal taxes. If YES is selected, when an invoice is created, no taxes can or will be applied to the invoice.
- Collections. This setting defaults to YES. That means the customer will be sent any scheduled automated payment reminders. Set to NO if you do not wish the customer to be sent automated reminders.
- Account Number is an optional field. If you have specific account numbers for your customers and would like then retained in ReliaBills, enter them here.
- Click the green Create Customer button when complete.
Customer Setup – Billing & Ship/Service Address
This section is ONLY available after the Customer Info has been saved and the customer created. In this second section, you will be able to add your customer’s address information.
IMPORTANT: If Postal had been selected as the customer’s mail preference in the previous section, address information will be required here.
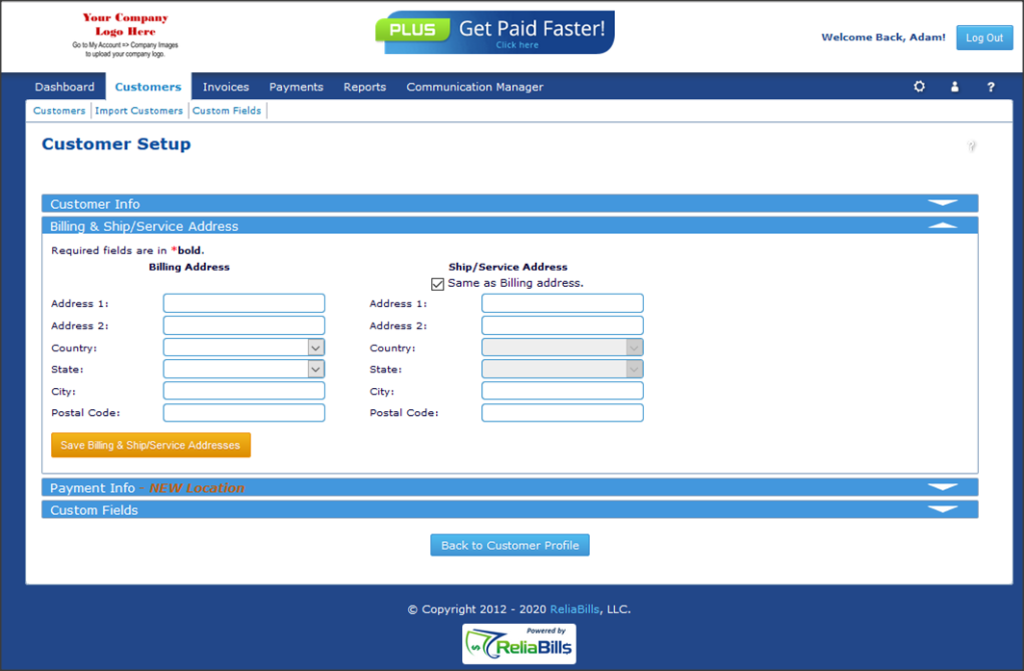
- Billing Address is the address to which invoices (if postal) would be sent.
- Ship/Service Address are optional fields. If service was provided or product shipped to an address that differs from the billing address AND you would like that address to appear on invoices, enter it here.
IMPORTANT: The SAVE button must be clicked to save ship/service information.
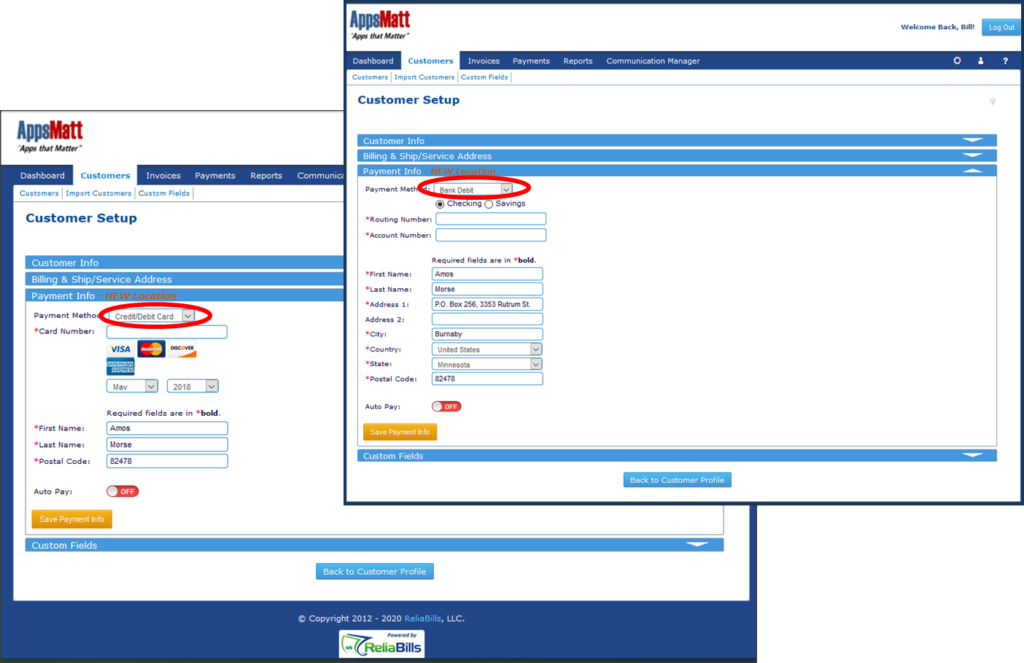
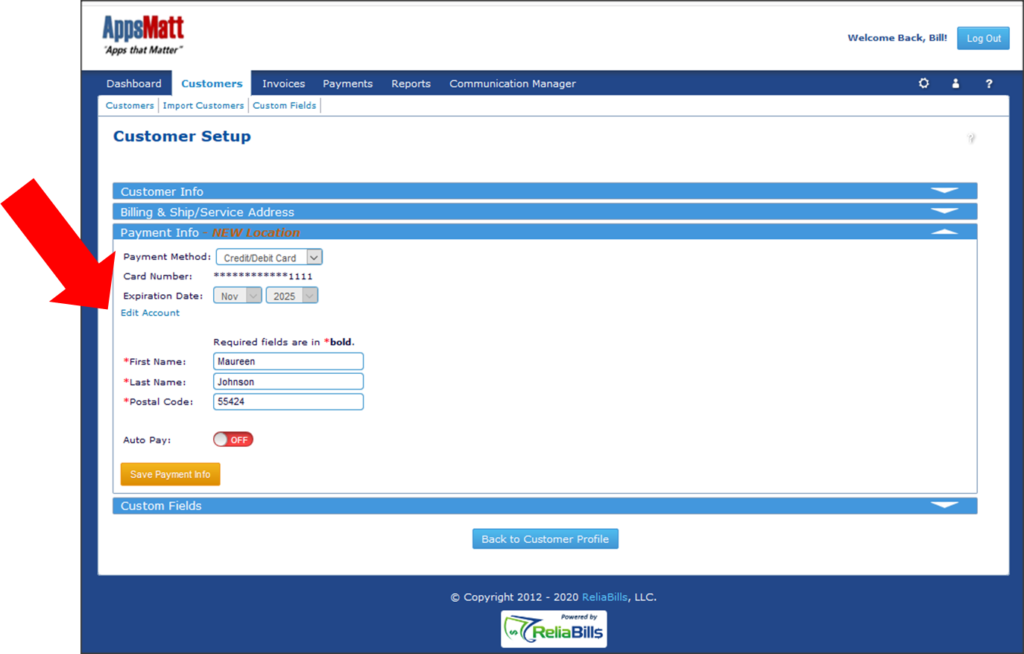
Customer Setup – Payment Information
The ability to securely store payment information is ONLY available in PLUS accounts. You have complete control over which cards (VISA, MasterCard, Discover, American Express) are offered to your customers or which payment methods (Card or Direct Bank Debit/ACH).
This page is a secure page. Meaning, once payment information has been entered, card numbers and bank account numbers are tokenized for security.
In this section you may also set your customers auto pay enrollment. IMPORTANT: You must have documentation from your customers directly authorizing their enrollment in auto pay.
Auto payments are made when an invoice is due (or past due) and a customer is enrolled in auto pay.
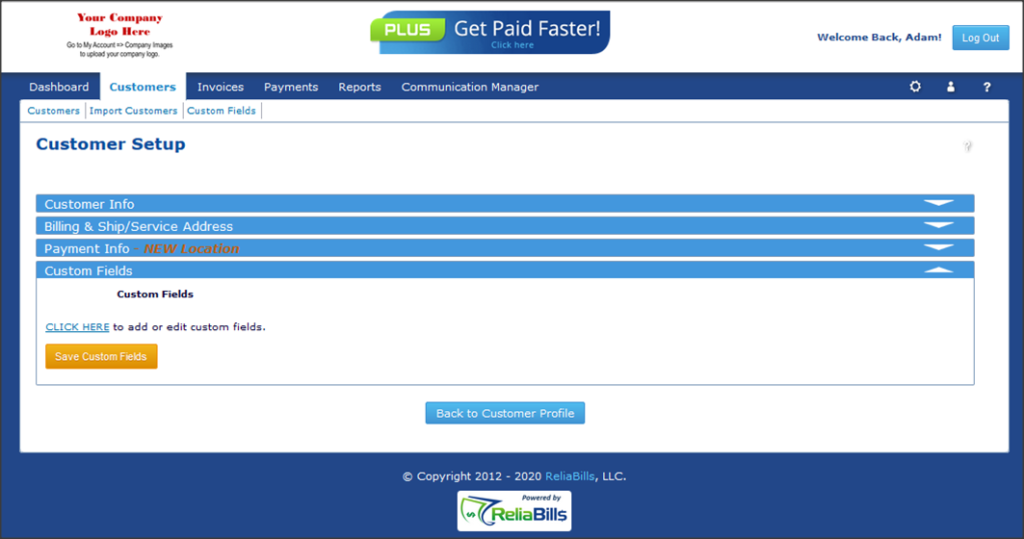
Customer Setup – Custom Fields
If you have created Custom Fields, they will appear here.
Delete Customers
There are two ways to Delete a customer:
1. From the Customer Profile page, simply click to edit profile, change the status of the customer from Active to Inactive and Save. When you inactivate a customer, no history (payments or invoices) is ever removed or deleted. However, you will be presented with a popup letting you know that this will close any open invoices and terminate any recurring invoices.
2. The second way to delete a customer is even easier. Go to the Customers tab. You will see a list of all your active customers. Just click the Delete link next to the customer that you want to be deleted. Once again, you will be presented with a popup letting you know that this will close any open invoices and terminate any recurring invoices.
IMPORTANT: Even though a customer may be deleted, they are not removed from the database and can be re-activated (see reactivating an inactive or deleted customer).
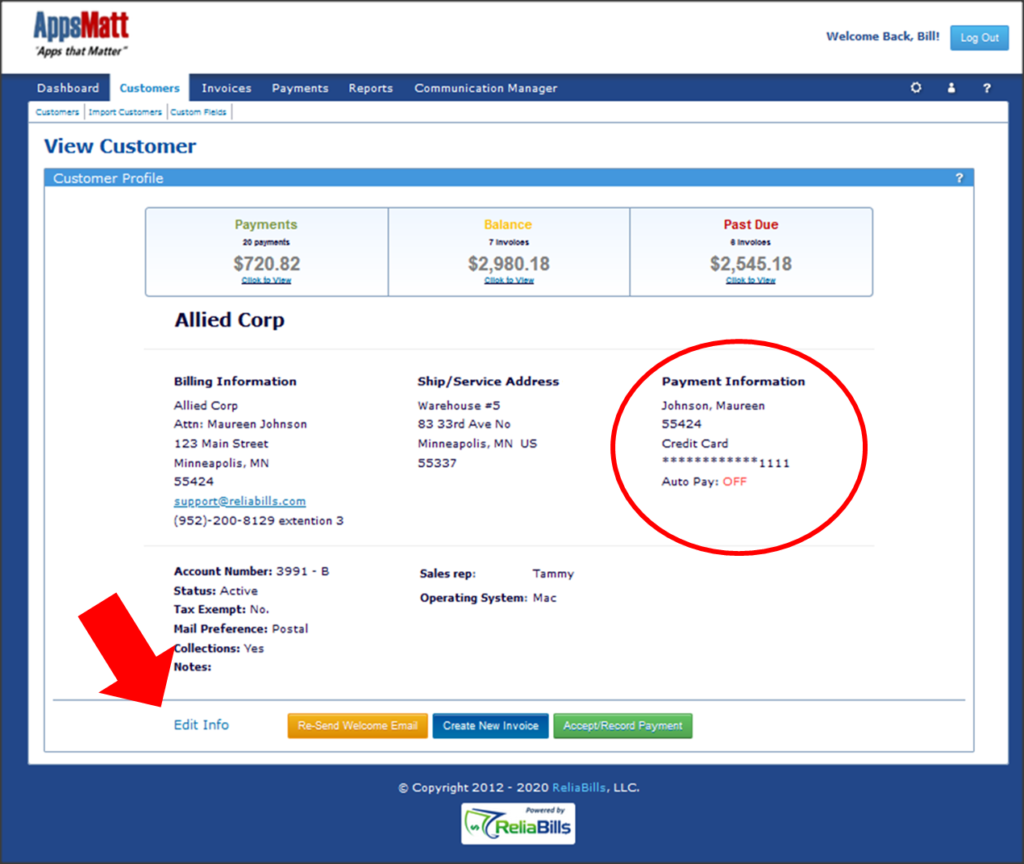
Edit Payment Information
You can securely store your customer billing info in the Customer Profile. These are some very important facts you need to remember:
- Store your credit cards and/or direct bank info (routing and account number)
- Only one of your payment methods may be active at a time.
- Activate Auto payment. Some form of explicit permission (written or contractually) is required.
- In order to add or edit customer billing information, simply go to the Customers tab.
- Search for the customer and click to View their Customer Profile. The link to edit payment information can be found in the lower right corner of the Customer profile.
Reactivating a Customer
The most important thing you need to remember is that just because you have deleted/de-activated a customer does not mean that they are gone. Their status has simply changed to inactive. That’s why they don’t show up anymore in dropdowns or listings. But they are easy to re-activate.
1. Start by going to the customer tab. All the customers being displayed are active customers.
2. Simply change the search criteria to ALL customers or Inactive customers.
3. When you see the customer that you want to make active, click to view the customer profile. Click the green Make Active button.
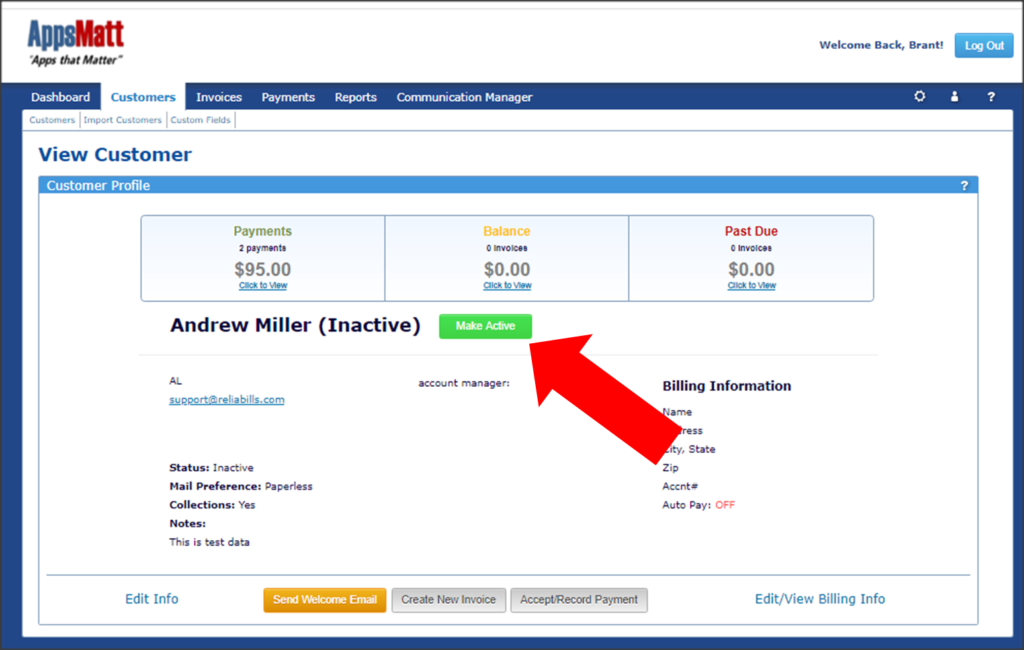
IMPORTANT: The customers’ past invoice and payment history are retained. But any open invoices and recurring invoices were closed when the customer was deactivated. They would need to be re-created.
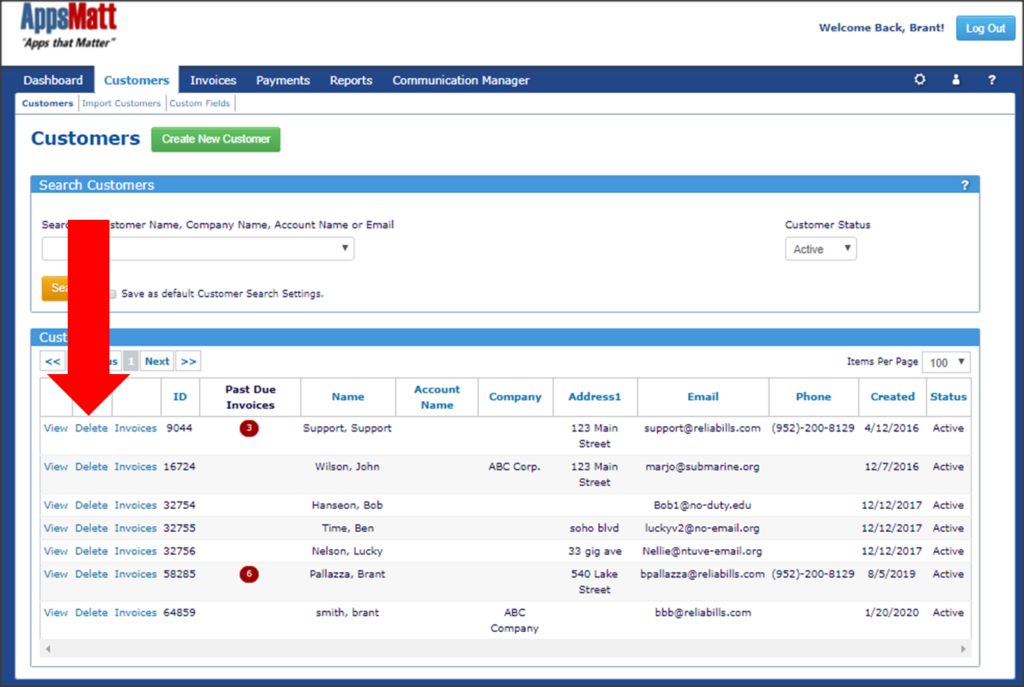
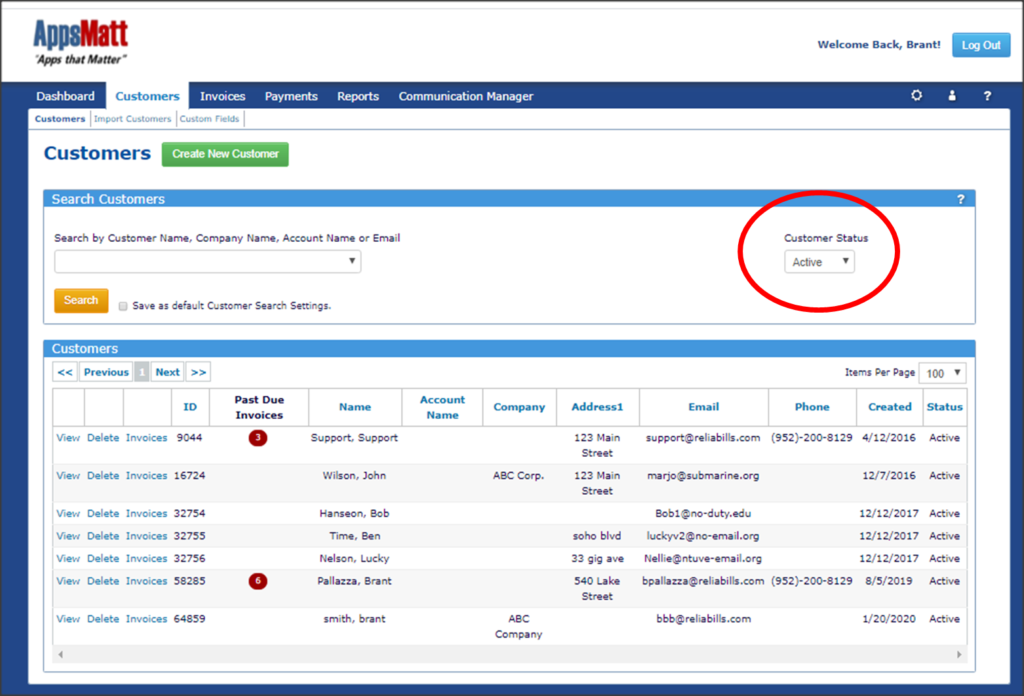
Search Customers
Customer information is always at your fingertips. You can search it by simply entering their name, an email, a company, etc.
You can also click on any column heading to sort in ascending order. Click it again to sort in descending order.
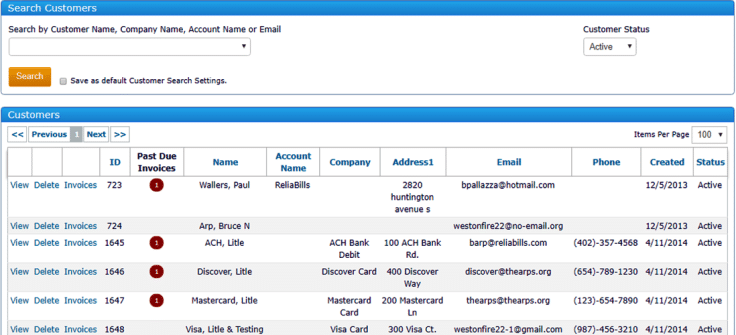
View Customers
Search for customers and then click the View link. Payment history, invoice history, billing info and more. Everything you need to know about your customers is right here.

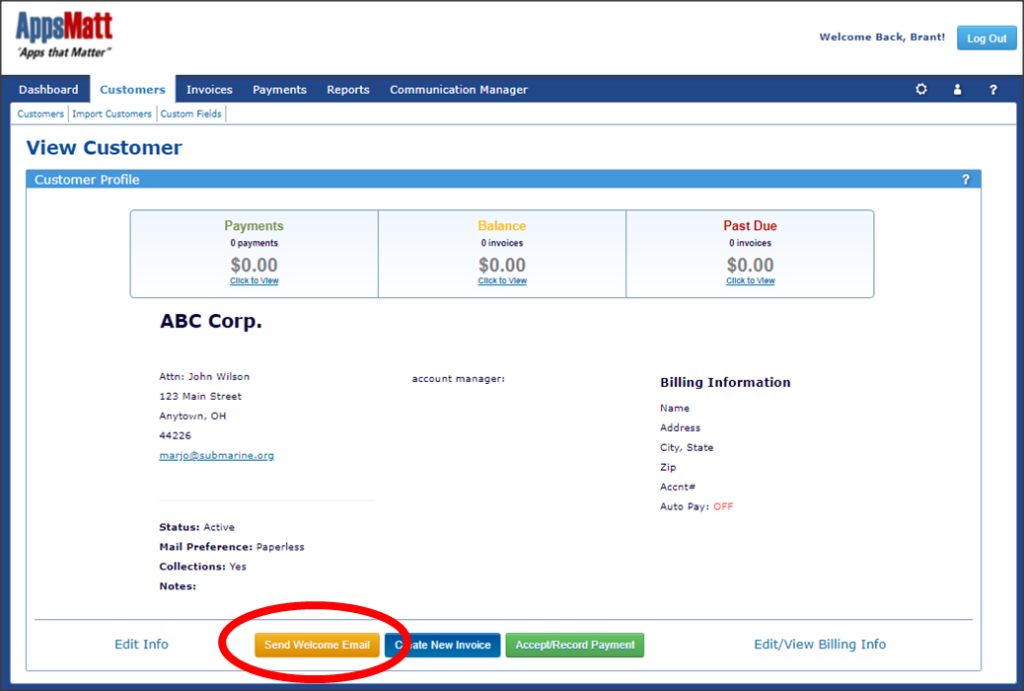
Welcome Email
- After entering new customer information and clicking the Save button, you will be taken to the customer’s completed profile. Here, you have the option to send your customer a Welcome email.
- The welcome email can be completely customized by you (See the Engagement Manager). It allows you to greet your customers.
- Introduce them to the features of your new billing service. And even send them logins and passwords to your billing portal (See the Customer Portal). This is entirely optional. You can send the Welcome Email as many times as you like. IMPORTANT: when you send the Welcome Email, the customer’s password is reset.