Customer Portal
Client View
The Customer Portal is where your customers will go securely log in. Where they view payment and invoice history, manage their personal information, securely store payment information and set their payment preferences. The portal is available to ReliaBills PLUS accounts only.
Customers will feel more comfortable going to the portal, logging in, and managing their accounts if the portal matches the look and feel of your website. That’s why we give you some simple customization tools.
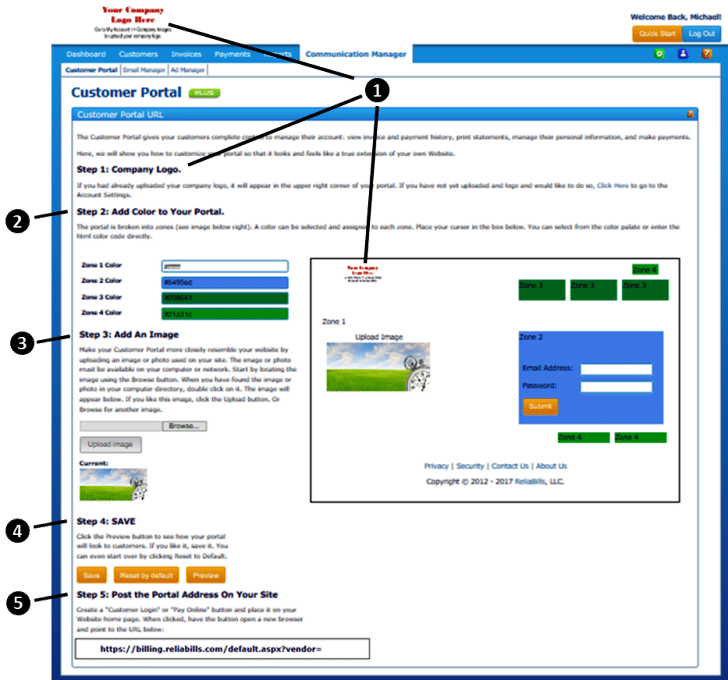
Step 1: Company Logo
If you have already uploaded your company logo, it will already appear here. If you need to add your logo, click the link to take you to Account Settings.
Step 2: Add Color to your Portal
The customer portal is broken into zones. A color can be selected and assigned to each zone. Place your cursor one of the color boxes and the color palette will appear. You can select from the color palette or enter the HTML color code directly.
- 1st Zone: This is the background color for the page.
- 2nd Zone: This is the area behind the login box.
- 3rd Zone: This is the color of the account buttons.
- 4th Zone: This is the color of the maintenance buttons.
Step 3: Add an Image
Make your Customer Portal more closely resemble your website by uploading an image or photo used on your site. The image or photo must be available on your computer or network. Start by locating the image using the Browse button. When you have found the image or photo in your computer directory, double click on it. The image will appear on the page. If you like this image, click the Upload button. Or Browse for another image.
Step 4: Save
Click the Preview button to see how your portal will look to customers. If you like it, save it. You can even start over by clicking Reset to Default.
Step 5: Post the Portal Address on your Site
If you want your customers to be able to pay their invoices from your website or if you want them to be able to log into the portal from your website, we give you the proper URL. If you are a PLUS account, the full URL will be displayed in this section.
You will need to add a button to your site. It can be a “Customer Login” or “Pay Online” button. Anything you want. Use whatever design or format matches your other navigation or buttons. We recommend the placement home page. When clicked, have the button open a new browser and point to the portal URL. When clicked, your customers will be able to log in.
Customer View
1. Customers can get to the portal from an invoice email or, if you place a log in button or Pay here button on your website, directly from your pages. When they go to a portal, they should see a login that you have customized to look and feels like your site.
2. From here, customers can make a payment or log in to their account. All they need is their email address and password. To retrieve a password, they just click the Need A Password button and follow the online instructions.
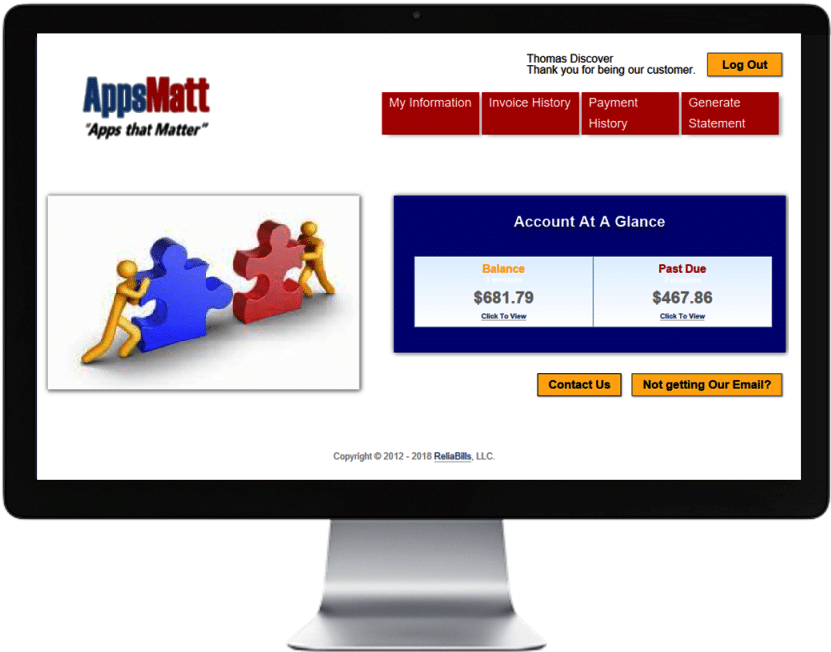
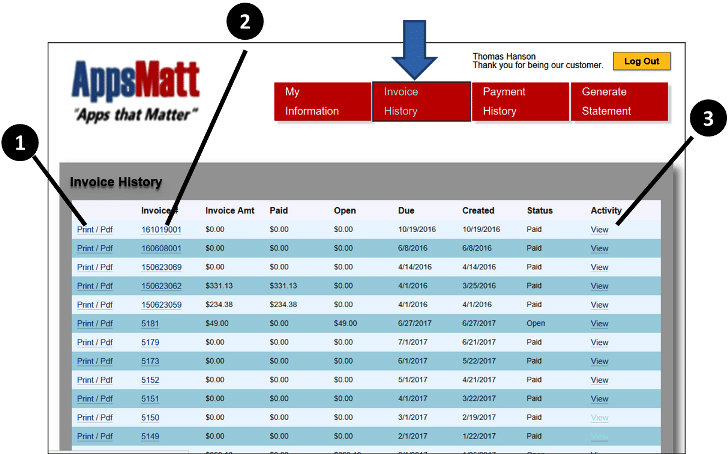
3. Once logged in, customers will see that it is personalized for them ❶. They’ll see their current account balance ❷. And any past due balances ❸.
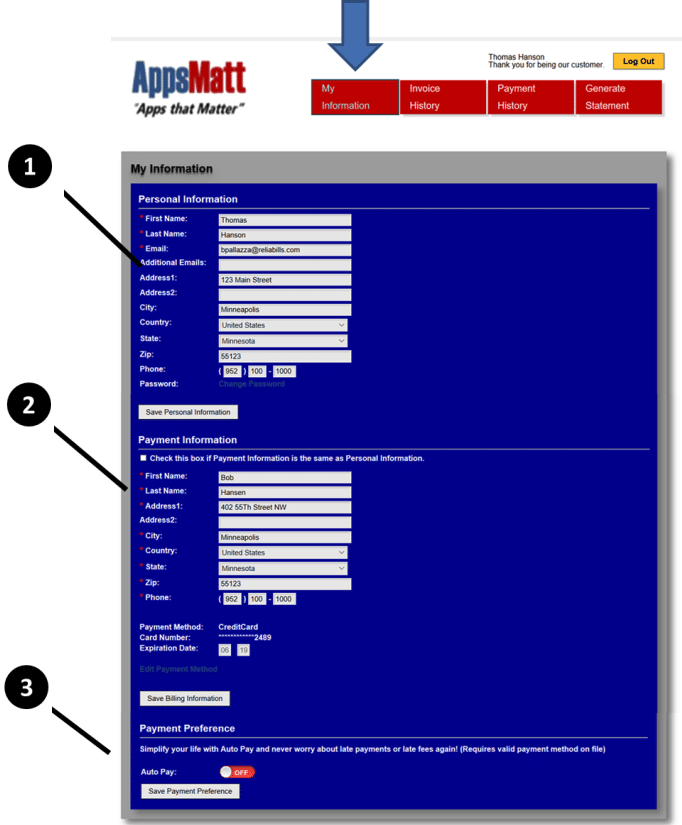
4. In the Invoice History tab, they can see every invoice. Including the current status and balance. They can click to print the invoice and view each invoice. They can even view Activity (all reminders and notices).
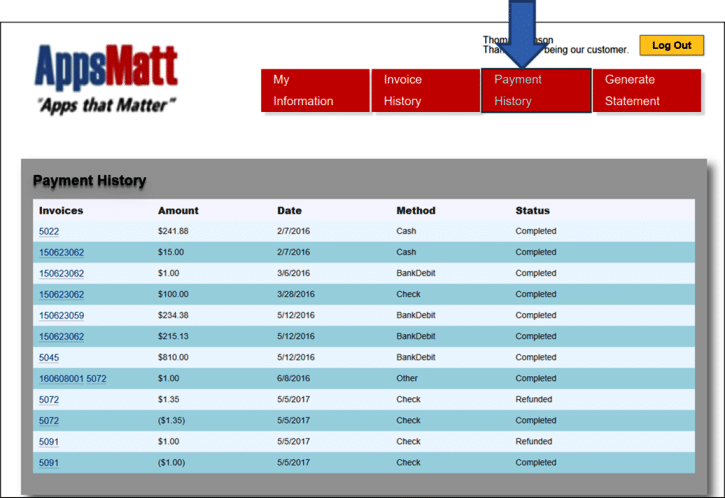
5. In the Payment History tab, they can see every payment and to which invoice(s) it was applied.
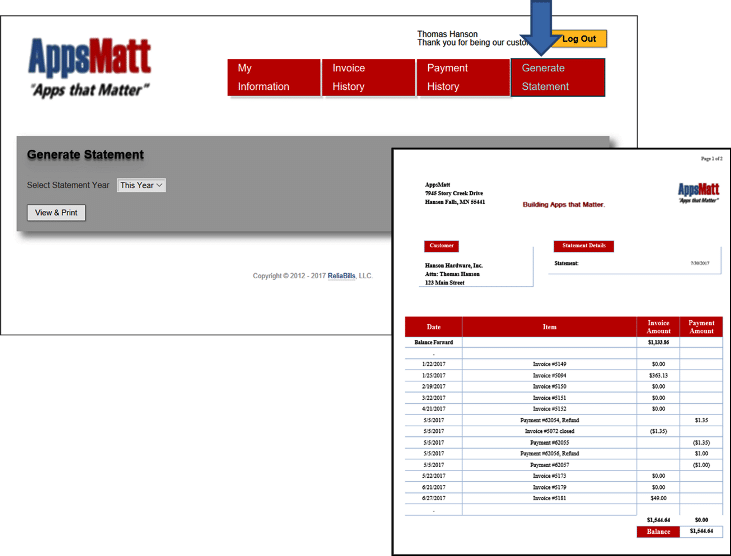
6. They can even generate their own statements for record-keeping and taxes.