
Installment Invoices
Create A New Installment Invoice
With ReliaBills, you can completely automate the creation of installment invoices. To get started…
- Start at the Invoices tab and then go to Installment Invoices.
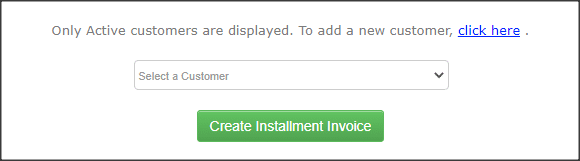
- Creating an installment invoice is not that different than creating a recurring invoice. Start by selecting the customer.
- If you haven’t created any customers yet, to add one, click the “Click here” link.
There are TWO sections in recurring invoices: The Recurring Profile (this defines when and how frequently invoices are to be generated). And the Invoice Details (this defines the what exactly what items are included in each invoice). What makes Installment invoices different, is that there is a THURD section. In this section, you start by defining the total balance due and how many invoices are to be created in order to collect that balance. This section is called the Payment Calculator.
Step 1: Payment Calculator
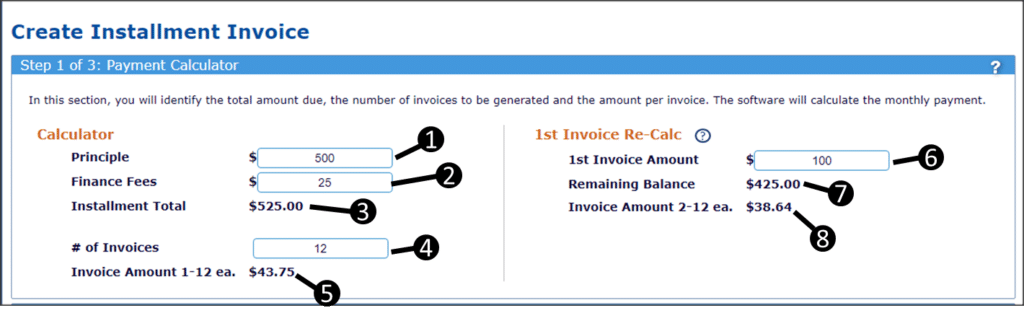
- Enter the principle amount owed.
- Enter any finance charges that you want collected.
- The system will sum 1 & 2 and show the Installment Total. This is the total balance due.
- Enter the number of invoices to be created.
- The system will divide the total installment amount by the number of invoices to be created and display the amount per invoice.
- If you intend to collect a larger payment upfront, such as a down payment, enter the amount here.
- The system will subtract the amount from #6 from the installment total and display the remaining balance.
- Dividing the remaining balance by the remaining number of invoices will calculate and display the amount for each of those remaining invoices.
Step 2: Recurring Profile
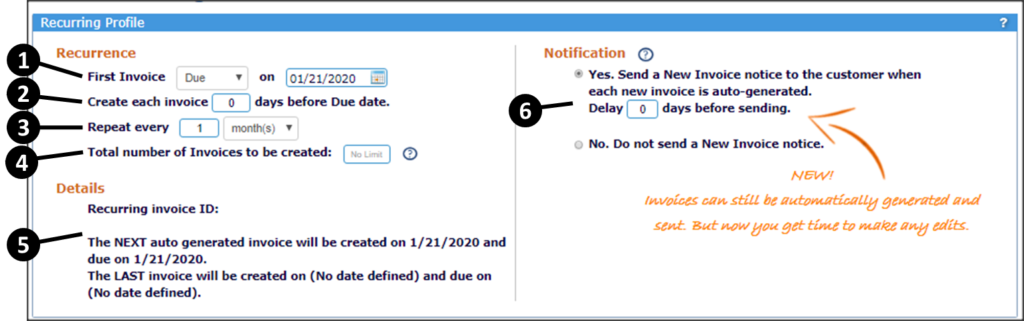
This step is identical to a Recurring Invoice.
- First Invoice: Consistency is VERY important in recurring billing. The varying number of days per month can create a mess. That’s why we give you the option of having your invoices generated based on either a DUE date or a CREATE date. Use the drop-down to have invoices DUE on the same day each period or CREATED on the same day.
Example: Do you want to have invoices CREATED on the first day of every month or DUE on the first day? - Days to Pay: Two dates are very important: the date on invoices are created and then the date the invoice is due. If, in step 1, you selected to have invoices generated based on CREATE date, then here you select how many days AFTER the create date the invoice would be DUE. If, in step 1, you selected to have invoices generated based on the DUE date, then here you would select how many days BEFORE the due date invoice would be CREATED.
- Repeat Every: Use the drop-down to have your invoices generated based on a defined number of days, months, years. For example, to have invoices automatically generated quarterly, enter “3” and then select “Month(s)”
- Total Number of Invoices to be Created: Leave this field blank. If there is no fixed number of invoices to be created and payments to be made. However, if you are setting up a fixed number of payments such as an installment plan. Enter the number of invoices to be created here.
- Details: This section is essential for your information. Based on the information that was entered in the previous steps, you will see when the next and the last invoices are to be created.
- Notifications: Here you can define whether or not you want to send each invoice to your customer when it is generated. Some business doesn’t want any notification. They just want to bill their client. In that case, select the “No” option. But if you want ReliaBills to send the invoice automatically when generated, select the “Yes” option. Some business has add-on fees in addition to the normal, recurring fee. ReliaBills allows you to benefit from automatically sending invoices…but here you can delay the automation by a few days. That gives you time to make any modifications or additions.
Step 3: Invoice Details
Here, you are identifying the product or service that the customer is being billed for. This is very similar to creating an invoice or a recurring invoice…with just a few very important exceptions.
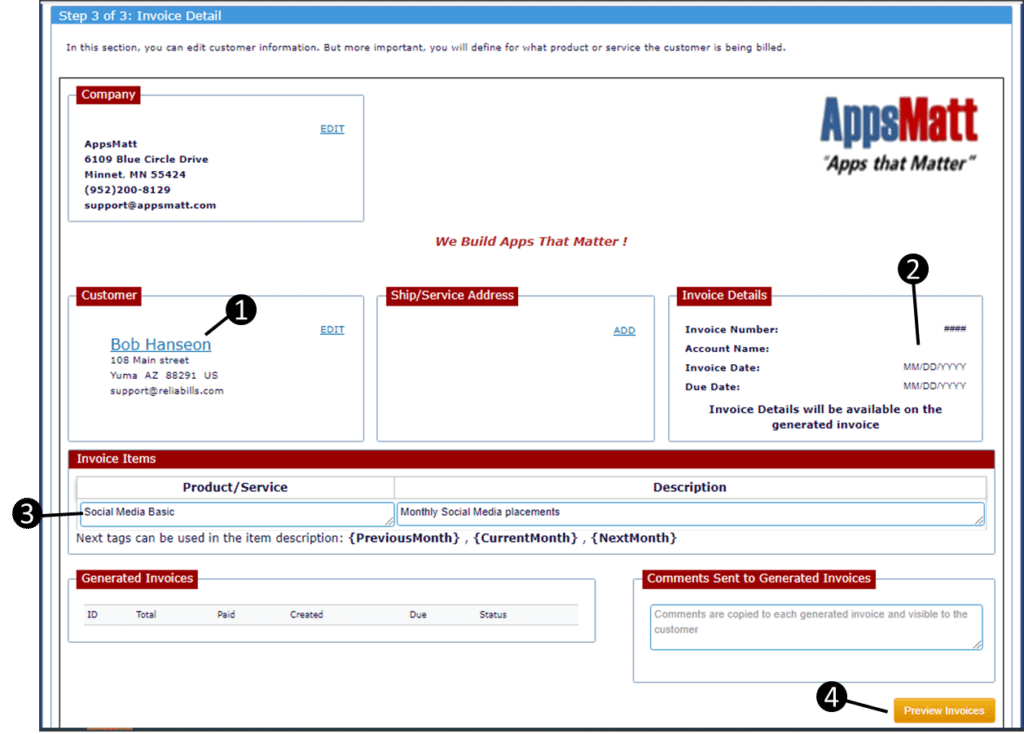
- Customer: You already identified the customer when you began creating the recurring template. So the customer appears here.
- Invoice Details: Remember, this is not a single invoice. Individual invoices will be generated with their own due dates based on the logic in your Recurring Profile.
- Generate Next Invoice: These are the items for which the customer is being billed. Notice that unlike single invoices and even recurring templates, you do not identify a quantity and price. That’s because the amount for each invoice was already defined in the Payment Calculator.
- In this last step, click the Preview button. This will open the window below.
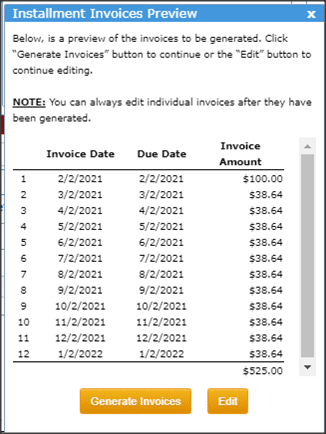
Here you will see a list of the invoices to be created by the installment template. If all looks good, Click the Generate Invoices button and invoices will be pre-generated. To make changes before generating invoices, click the Edit button.