
Running an auto body shop means handling a mix of complex repairs, parts replacements, insurance claims, and customer expectations. One thing that keeps everything organized and professional is a well-made invoice. A clear and detailed invoice helps customers understand exactly what they are paying for and gives your shop a reliable record of every job.
A good body shop invoice also reduces disputes, speeds up payments, and makes your business appear more trustworthy. Whether you repair collision damage, handle paint jobs, or manage insurance-related work, the right invoicing process ensures smooth communication between your shop, your customers, and insurance adjusters.
What Is a Body Shop Invoice?
A body shop invoice is a document that outlines the repairs, parts, materials, and labor provided during an auto body service. It is more detailed than a standard auto repair invoice because body shops often work with structural repairs, paint refinishing, insurance documentation, and specialty materials that require precise breakdowns. Its purpose is to give customers a transparent view of all service charges so they know how the final cost was calculated.
When Should a Body Shop Issue an Invoice?
Body shops typically issue invoices after completing work such as:
- Collision repair
- Dent or scratch removal
- Paint refinishing
- Frame straightening
- Restoration projects
- Rust repair
- Insurance-covered damage repairs
Whenever the shop completes a service, provides parts, or submits work for insurance approval, an invoice is needed to finalize payment and keep records straight.
Key Components of a Body Shop Invoice
A complete body shop invoice should include:
- Auto body shop name, address, contact info, and license details
- Customer information
- Vehicle details such as make, model, year, VIN, plate number
- Labor breakdown including hours and rate
- Parts used with quantities and unit prices
- Materials like paint, clear coat, and fillers
- Additional services
- Taxes and fees
- Total amount due
- Payment terms and accepted methods
- Insurance information if applicable
Clear and complete information builds transparency and supports faster payment.
How to Create a Body Shop Invoice (Step-by-Step)
- Gather customer and vehicle details
- List all repair procedures performed
- Itemize labor hours and describe each task
- Add all parts used with pricing
- Include paint and material charges
- Add shop supplies or environmental fees if applicable
- Add insurance claim numbers if relevant
- Calculate totals and taxes
- Finalize payment terms and due dates
- Send the invoice digitally or print a copy for the customer
A systematic approach reduces errors and makes your invoice easy to understand.
How to Itemize Labor, Parts, and Materials Correctly
Itemization is crucial because body shops perform technical work that customers and insurers need to clearly understand. Break down tasks like panel replacement, dent repair, sanding, prepping, painting, alignment, and refinishing. For parts, list each item and price separately, such as bumpers, fenders, headlights, or clips. Always include paint, primer, clear coat, and other material charges. This gives a transparent breakdown of the total cost.
Including Insurance Claim Information (If Applicable)
If the repair is insurance-related, your invoice should include:
- Insurance company name
- Claim number
- Adjuster name and contact
- Approved estimate
- Photos or documentation as attachments
The clearer the documentation, the smoother the approval and payment process.
Common Mistakes to Avoid in Body Shop Invoicing
Avoid errors like:
- Missing VIN or vehicle details
- Vague service descriptions
- Not itemizing parts and labor
- Forgetting to attach insurance documents
- Incorrect totals or tax calculations
- Lack of payment terms
These mistakes can cause delays or customer confusion.
Body Shop Invoice Template (Example)
Body Shop Name
Address
Phone | Email
Customer Information
Name
Address
Phone
Vehicle Information
Make
Model
Year
VIN
Services and Labor
- Dent repair: 2 hours at $80/hour
- Panel repaint: 3 hours at $85/hour
Parts
- Left fender: $160
- Paint materials: $45
Totals
Labor Total
Parts Total
Tax
Grand Total
Payment Terms
Payment Due By: ___
How ReliaBills Can Help Auto Body Shops With Invoicing
ReliaBills provides auto body shops with the tools needed to create clean, accurate, and professional invoices. You can build a detailed body shop invoice in minutes using customizable templates that let you list repairs, parts, paint materials, and insurance details. This ensures every invoice is complete, clear, and easy for customers or insurance adjusters to understand.
The platform also streamlines organization by keeping all documents in one place, including photos, estimates, and claim information. You can send invoices digitally, automate payment reminders, and track customer balances without digging through paperwork. This is especially useful for shops handling multiple repairs each week or managing frequent insurance jobs.
ReliaBills also supports recurring billing. If your auto body shop works with dealerships, fleet clients, or ongoing service accounts, recurring billing helps you automate repeated invoices and ensure timely payments every cycle. Combined with automated reminders, online payment options, and detailed reporting, ReliaBills gives body shops a smoother and more efficient invoicing system.
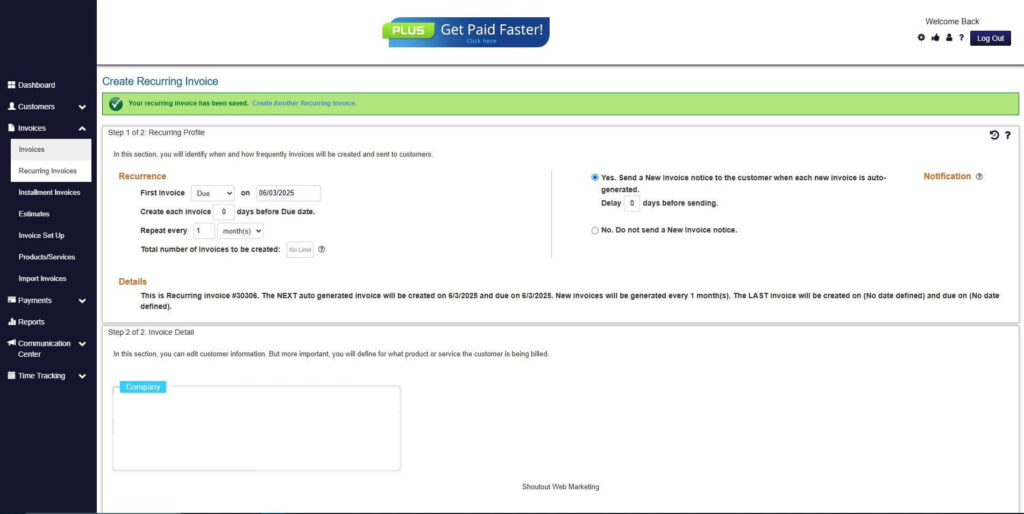
How to Create a New Recurring Invoice Using ReliaBills
Creating a New Recurring Invoice using ReliaBills involves the following steps:
Step 1: Login to ReliaBills
- Access your ReliaBills Account using your login credentials. If you don’t have an account, sign up here.
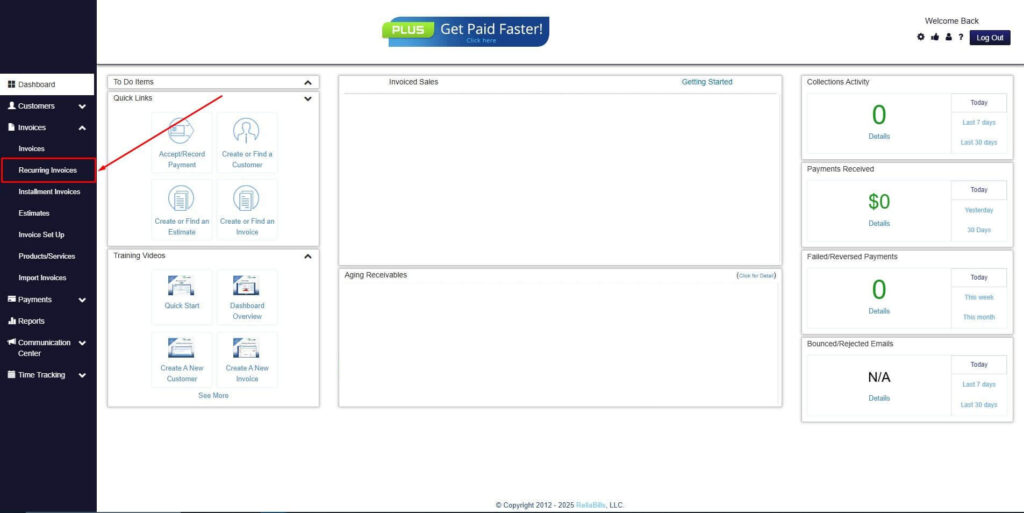
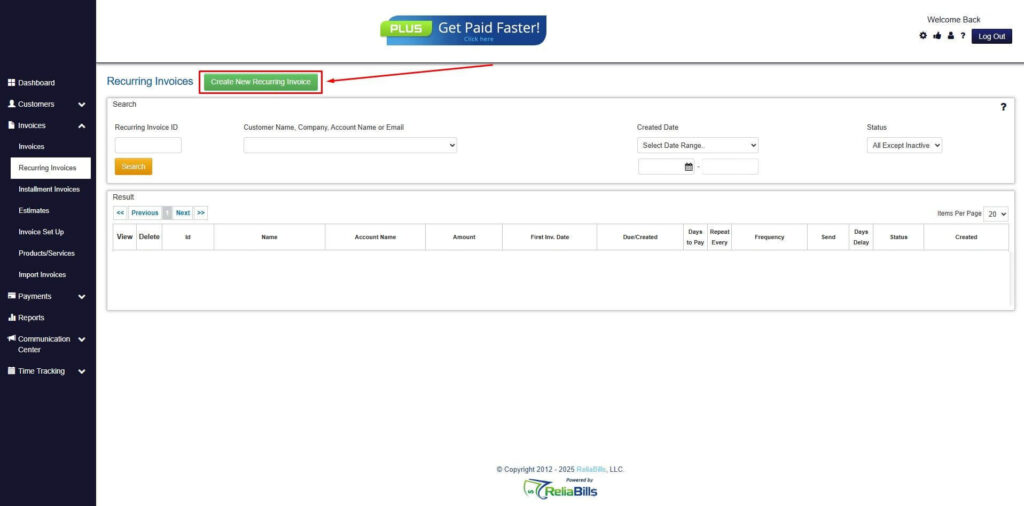
Step 2: Click on Recurring Invoices
- Navigate to the Invoices Dropdown and click on Recurring Invoices for an overview of the list of your existing customers.
Step 3: Go to the Customers Tab
- If you have already created a customer, search for them in the Customers tab and make sure their status is “Active”.
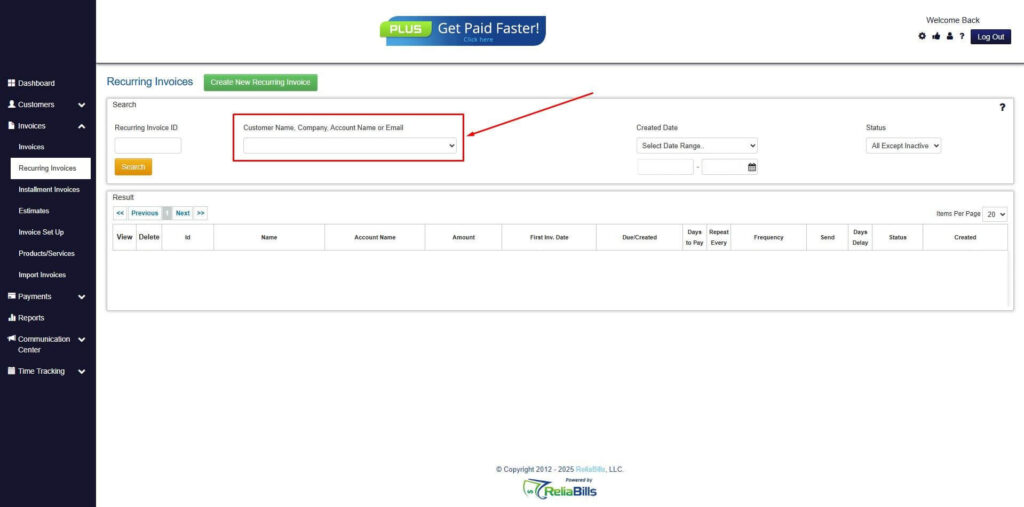
Step 4: Click the Create New Recurring Invoice
- If you haven’t created any customers yet, click the Create New Recurring Invoice to create a new customer.
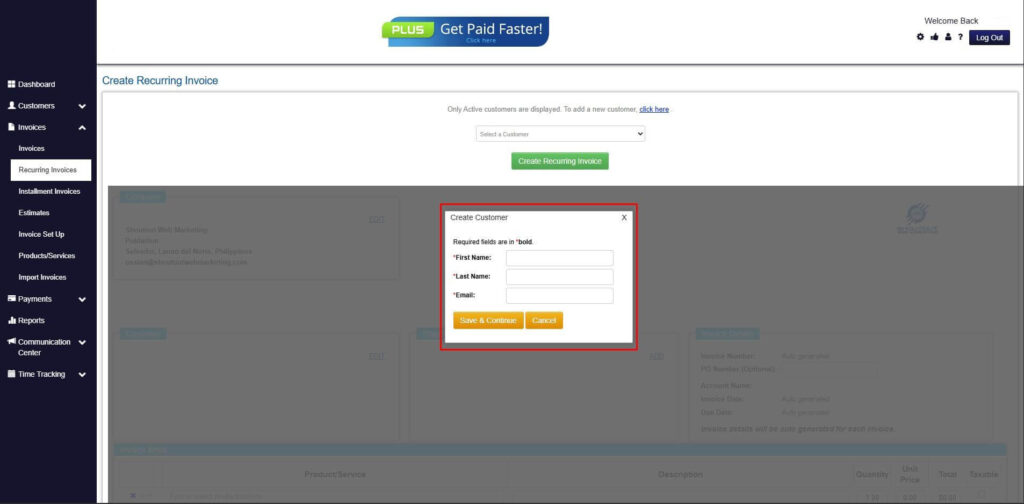
Step 5: Click on the “Click here” Button
- Click on the “Click here” button to proceed with the recurring invoice creation.

Step 6: Create Customer
- Provide your First Name, Last Name, and Email to proceed.
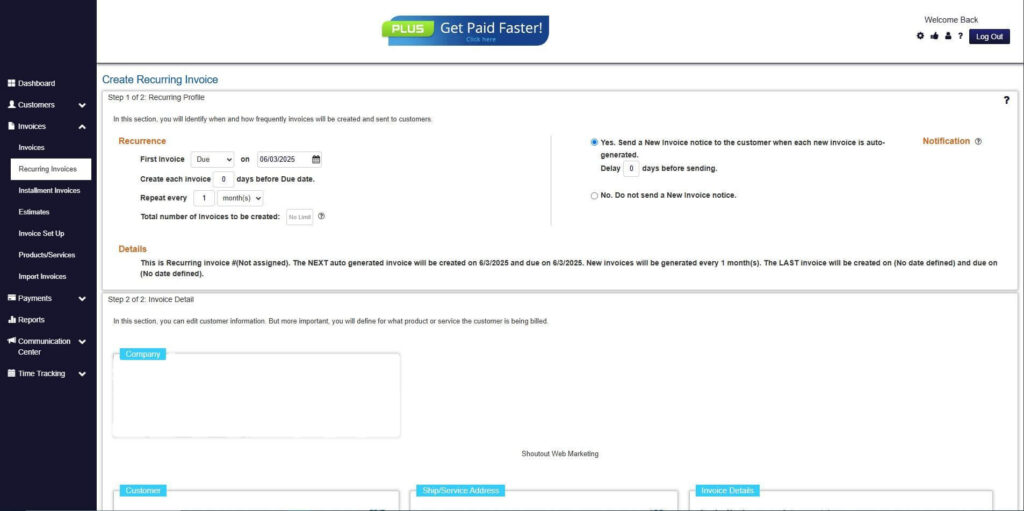
Step 7: Fill in the Create Recurring Invoice Form
- Fill in all the necessary fields.
Step 8: Save Recurring Invoice
- After filling up the form, click “Save Recurring Invoice” to continue.
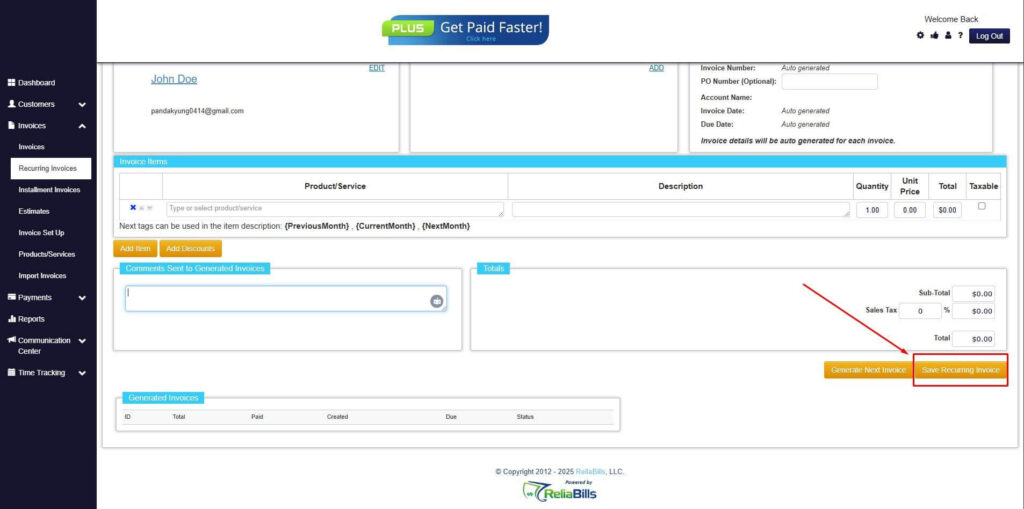
Step 9: Recurring Invoice Created
- Your Recurring Invoice has been created.
Frequently Asked Questions
1. Can a body shop invoice include diagnostic fees?
Yes. If your shop performs assessments or diagnostics before repairs, these fees should be itemized on the invoice.
2. Should I list paint materials separately?
Yes. Itemizing materials such as primer, clear coat, and color matching improves transparency.
3. Do insurance companies require a specific invoice format?
Most insurers accept standardized invoices as long as they include claim numbers, repair descriptions, and documentation.
4. Can body shops charge storage fees?
Yes. If a vehicle is stored while waiting for approval or parts, you can include storage fees based on your shop rates.
5. Is a digital body shop invoice acceptable for insurance claims?
Absolutely. Digital invoices are preferred because they are easier to submit, track, and approve.
Conclusion
A well-made body shop invoice makes your services look professional, reduces misunderstandings, and speeds up payment. By itemizing repairs, listing parts clearly, and including insurance details when needed, you create a smooth and transparent experience for customers and adjusters. Using a tool like ReliaBills can help automate these tasks and improve your overall billing process.